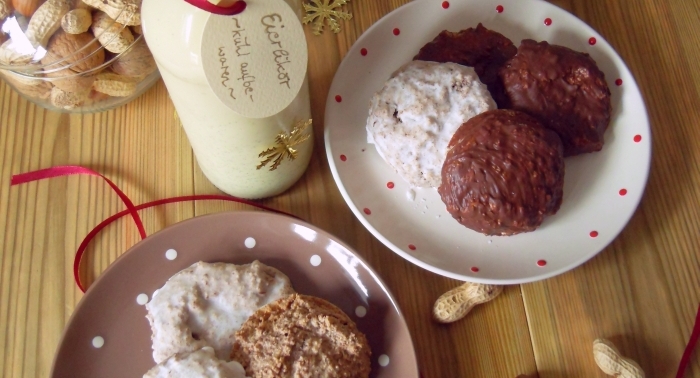
[:de]Eierlikörkuchen im Glas[:en]Eggnog Cake in Weck Jars[:]

[:de]

Regelmäßig habe ich Lust auf Kuchen, aber in einem 2 Personenhaushalt wird einfach nicht so viel gegessen. Und frisch schmeckt Kuchen einfach immer viel besser, als wenn er schon Tage herumsteht. Dazu kam, dass ich Eierlikör hatte der weg musste und Kuchen im Glas wollte ich sowieso schon immer mal ausprobieren!

Jetzt könnte ich mir nichts praktischeres mehr vorstellen!

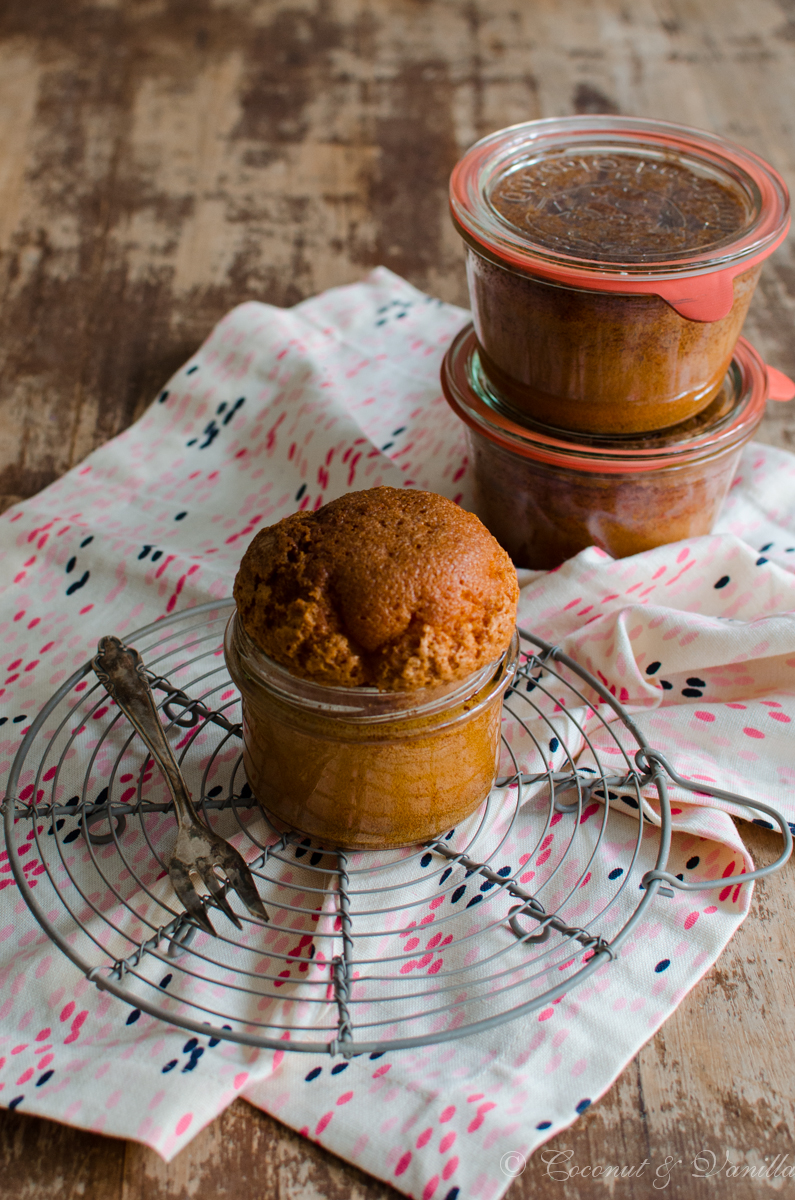
Anstatt in einer großen Form bäckt man den Kuchen einfach in vielen kleinen Gläsern und schraubt sie nach dem Backen gleich zu. Durch das Abkühlen entsteht dann das Vakuum und der Kuchen ist für mehrere Monate eingemacht. So kann ich immer frischen Kuchen auf die Arbeit mitnehmen und der Kuchenjieper ist sofort gestillt!

Nun naht auch langsam, aber sicher Weihnachten und was bietet sich da besser an als diese kleinen Kuchen im Glas zu verschenken? Natürlich kann man auch jeden anderen trockenen Rührkuchen im Glas einmachen. Schoko oder Zitrone zum Beispiel! Wobei Eierlikör immer so wunderbar saftig ist!

Die Größe der Gläser kann man natürlich individuell anpassen. Ich habe der Optik wegen Weckgläser verwendet und ein paar kleinere 250 ml Schraubgläser. Beides super praktisch! Wichtig ist nur, dass man Sturzgläser verwendet, das heißt die Gläser sollten einen glatten Rand haben, sonst bekommt man den Kuchen nicht mehr aus dem Glas. Außerdem darf man die Gläser nur maximal halbvoll mit Teig füllen! Ansonsten bekommt man den Deckel nicht mehr auf das Glas.

Eierlikörkuchen im Weck-Glas - Eggnog Cake in Weck Jars by Coconut & Vanilla

Vor einem Jahr: Haferflockenporridge mit Möhren, Kokos und Orange

Vor drei Jahren: Kartoffelterrine mit Ziegenkäse, Basilikum und Pinienkernen

Vor vier Jahren: Orangen-Rotkohl mit Gorgonzola

Vor fünf Jahren: Flan Tarte


[:en]

Regularly I long for cake, but we don’t consume much cake in a 2-person household. Also a freshly baked cake tastes much better, then one that gets stale after days on the counter. So I longed for cake and had some eggnog left, so I decided to give cakes in jars finally a try!

Now I cannot imagine anything more convenient!

Instead of using a large baking pan you use several small jars, that are closed with lids right after baking. Due to the cooling vacuum emerges and the cakes are lasting for a few months. Like this I always have fresh cake to take to work and the cake desire is soothed.

Slowly, but steadily Christmas emerges and these cake in jars would be a great culinary gift! Of course, you can bake every other dry cake in these jars. Chocolate or lemon for example! But eggnog is always so wonderfully moist!

The size of the jars can be adjusted individually just how you prefer it. I chose Weck jars, because of their looks and also some smaller 250 ml jars. Both are super handy, the Weck jars for 2 persons, the 250 ml jars for 1 person.
The only important thing is, that you use so called „Sturzglas“, these are jars with white cylindrical mouths, because otherwise you cannot release the cake from the jars. Moreover it is important to filll the jars only half way with batter, otherwise the cake rises that much, that you cannot close them with the lid.

Eierlikörkuchen im Weck-Glas - Eggnog Cake in Weck Jars by Coconut & Vanilla

One year ago: oat porridge with carrots, coconut and orange

Three years ago: potato terrine with goats cheese, basil and pine nuts

Four years ago: red cabbage with oranges and gorgonzola

Five years ago: flan tart

[:]

Rauchige Mango-Whisky-BarbecuesauceSmoky Mango Whisky Barbecuesauce

Vorletztes Jahr hatte ich eine wundervolle Barbecuesauce mit Pfirsichen eingemacht. Leider habe ich es letzten Sommer mit den Pfirsichen nicht auf die Reihe bekommen und so sahen die Barbecuesaucen-Vorräte im Herbst ganz mager aus.

Dann war ich im November auf ein tolles Whiskyevent eingeladen und in Folge dessen habe ich mit rauchigem Ardmore-Whisky experimentiert. Und nichts passte auf Anhieb besser, als meine Barbecuesauce damit zu verfeinern um damit das typisch rauchige Aroma zu erzielen. Da auch noch Mangosaison war und es ganz wunderbare reife aromatische Früchte zu kaufen gab, habe ich zugeschlagen und diese exzellente fruchtige, rauchige Mango-Barbecuesauce mit Whisky kreiert!

Ardmore Whisky - Coconut & Vanilla

Ich habe mich bisher kaum mit Whisky beschäftigt. Ich war zwar im Schottland Urlaub in der Glenfiddich Destillery, aber danach habe ich eher meine Leidenschaft für guten Whiskylikör entdeckt als für Whisky.

Mit einer Handvoll Bloggern wurde ich von Ketchum Pleon eingeladen um Ardmore Whisky im Vergleich zum Auchentoshan Whisky zu verkosten. Es war sehr spannend zu sehen wie groß die Unterschiede sind und wie gut das Rauchige des Räucherns herauskommt. Ich kann zwar nun nicht behaupten das Malt Whiskys zu meinen neuen Lieblingsspirituosen gehören, jedoch kann ich den Ardmore definitv als „Einsteiger“ Single Malt empfehlen. Meine Neuentdeckung für mich war eher die Gegenverkostung ;).

Ardmore Whisky - Coconut & Vanilla

Es steckt sehr viel mehr hinter guten Spirituosen und es geht nicht einfach nur um’s „Saufen“. So ein Tasting bringt ganz neue Einblicke und ist wirklich interessant und spannend. Mir hat es großen Spaß gemacht und ich bedanke mich für die Einladung und das toll organisierte Event!

Den meisten von Euch werde ich sicherlich nicht mehr erzählen müssen was man mit dieser Barbecuesauce alles anstellen kann. Lasst Euch aber gesagt sein, dass kombiniert mit dem karamellisierten Zwiebelrelish und noch ein paar grandiosen Zutaten ein ganz außergewöhnlicher und verdammter guter Burger bauen lässt! Das Rezept wird folgen! Nun lasse ich Euch erstmal Zeit die beiden Grundzutaten für den Burger nachzukochen. Anschließend ist der Burger nämlich ruckzuck zusammengebaut!

Rauchige Mango-Whisky-Barbecuesauce von Coconut & Vanilla

Vor einem Jahr: Butterschmalz selbstgemacht

Vor drei Jahren: Frischkäsebällchen mit Kräutern und Walnüssen


Last year I made a batch of barbecue sauce with peaches. Unfortunately I couldn’t manage it with the peaches last summer and so in autumn the barbecue sauce in stock looked very meager.

Then in November I was invited to a whisky event and after that I was able to experiment with the smoky Single Malt Whisky Ardmore. And nothing fit better than to refine my barbecue sauce with that whisky and to get that typical smoky flavour. Also mangoes were in season and so I bought a bunch of ripe aromatic fruits and created this excellent fruity and smoky mango barbecue sauce with whisky!

Ardmore Whisky - Coconut & Vanilla

Honestly I didn’t bother much about whisky until then. I was on vacation in Scotland and visited the famous Glenfiddich Destillery, but after that I rather discovered my passion for good whisky liquor than for whisky.

Together with few other bloggers I was invited by Ketchum Pleon to savour whisky and I had a really good time! We compared Ardmore whisky with Auchentoshan whisky. It was very fascinating to see the huge differences and how good the smokiness of the smoking process can be tasted. I cannot say that malt whiskys are my favourite spirits now, but I can defintely recommend Ardmore as a single malt for novices. My discovery was rather the opposition ;).

Ardmore Whisky - Coconut & Vanilla

There’s more behind a good spirit and it’s not just about drinking, when consuming alcohol. Such a tasting reveals new insights and is very interesting and fascinating. I had a lot of fun and I’m thankful for having the opportunity!

I don’t need to tell most of you what to do with this fantastic bbq sauce, right? But let me tell you, that if you are making a burger and combining the sauce with the caramelized onions and some other awesome ingredients, you’ll be able to make an overly exciting burger! Recipes will follow! But now I’ll give you some time to make these two ingredients for a burger. The burger is put together then in no time!

Rauchige Mango-Whisky-Barbecuesauce von Coconut & Vanilla

One year ago: homemade clarified butter

Three years ago: cream cheese balls with herbs and walnuts


Peanut Butter CupsPeanut Butter Cups

In letzter Zeit stehe ich total auf Süßigkeiten. Selbstgemachte Süßigkeiten! Und dann ist mir bei Waterstones in London auch noch ein wahnsinnstolles Buch in die Hände gefallen, seitdem überlege ich ständig was ich Leckeres daraus nachmachen könnte. Als erstes waren die Peanut Butter Cups dran. Nicht weil ich darauf besonders scharf war (ich hatte noch nie davor welche gekostet), aber hallooo! Erdnuss und Schokolade ist ja wohl nur geil! Und das Rezept war simpel und schnell zu verwirklichen!

Peanut Butter Cups

Daher kann ich Euch die Peanut Butter Cups auch prima als Last Minute Geschenk zu Weihnachten empfehlen! Wenn ihr am 23. oder 24. verzweifelt seid, denkt an mich und die Peanut Butter Cups! Praktisch ist nämlich auch, dass man nicht viele Zutaten braucht und wenn man sie nicht sowieso zu Hause, bekommt man sie auch noch schnell im Supermarkt. Keine fancy Glukose oder so, nur Schokolade und Erdnuss. Heaven!

Die kleinen Dinger sind so klein und verführerisch und mit einem Haps im Mund, ganz großes Kino! Und hab ich schon die Kombi Schokolade und Erdnuss erwähnt? Jaa, genau, sehr lecker! Wer es mag, dem empfehle ich noch einen Hauch Fleur de Sel auf den Peanut Butter Cups zwischen den gehackten Erdnüssen. Das wäre wirklich perfekt!

Peanut Butter Cups

Vor zwei Jahren: Pâté von der Räuchermakrele

Vor drei Jahren: Orangen-Vanille-Stangen

Vor fünf Jahren: Crème Brûlée mit Gewürzen

Lately I’m totally into sweets. Homemade sweets of course! Incidentally in London at Waterstones I bought this great book and since then I’m always thinking what I can make next from this book. First I made this peanut butter cups. Not because I was so eager to taste them (I’ve never had them before), but helloooo! Peanuts and chocolate are just awesome! But also this recipe was an easy and quick one!

Peanut Butter Cups

Therefore I can recommend you these peanut butter cups also as a last minute gift for christmas! If you are desperate on the 23. or 24. think of me and the peanut butter cups! It’s also very handy that you don’t need many ingredients and if you don’t have them at home you get them quickly in every supermarket. No fancy glucose or something like this, just chocolate and peanuts. Heaven!

These small bites are so petite and luscious and with one bite they are gone! And did I already mention the combo chocolate and peanuts? Yeees, exactly, so good! If you like, I recommend to add a pinch of fleur de sel to the chopped peanuts on top. This would be just perfect!

Peanut Butter Cups

Two years ago: smoked mackerel pâté

Three years ago: orange vanilla sticks

Five years ago: spiced crème brûlée

ChaigewürzChai Spice

Morgens geht der Tag los mit einer Tasse Chaitee. Zuhause muss es ein offener Tee sein. Erst kürzlich habe ich einen ganz tollen Bio-Chaitee entdeckt, der kostet zwar fast doppelt so viel wie der konventionelle, enthält dafür aber keine Aromen und schmeckt wirklich sensationell! Auf der Arbeit greife ich dann doch zum Beuteltee, dabei mag ich den Chaitee von Yogi und den von Alnatura am liebsten (ich steh auf die philosophischen Sprüche auf den Teebeutelanhängern beim Yogitee 😉 ). Hier ist Bio wirklich Trumpf, denn die anderen schmecken nur künstlich. Und da Chai auch in anderen Sachen soo lecker schmeckt, habe ich jetzt eine eigene Gewürzmischung hergestellt. Ich mag diesen wohlig-warmen würzigen Geschmack so sehr!

Die Gewürzmischung eignet sich übrigens bestens als kulinarisches Geschenk zu Weihnachten! Kleine Gläschen mit Chaigewürz, daran einen Anhänger was man alles tolles damit verfeinern kann oder ein Rezept anhängen, fertig!

Ich verwende für diesen Zweck eine Gewürzmühle bzw. einen Aufsatz zum Gewürze „mahlen“ (die Maschine zerkleinert die Gewürze tatsächlich mit einem Messer anstatt mit einem Mahlwerk, das Teil heißt trotzdem Gewürzmühle) meiner Kenwood Küchenmaschine (leider gibt es dieses Modell nicht mehr, aber ähnliche). Das ist wirklich unglaublich praktisch und hat sich auch schon bei einigen indischen Gerichten gelohnt. Wer so ein Multifunktionstalent nicht zu Hause hat, der kann auch eine kleine Gewürzmühle oder eine Kaffeemühle verwenden. Dann aber darauf achten, dass keine Geschmacksstoffe vom vorherigen Mahlgut übertragen werden können.

Ein Trick hierzu: Einfach ein Esslöffel Reis vorher mahlen, der neutralisiert die Geschmacksstoffe weitestgehend und „reinigt“ so die Mühle.

Ansonsten benötigt ihr keine besonderen Zutaten, achtet nur darauf, dass ihr echte Ceylon-Zimtstangen verwendet, diese sind hochwertiger als die Cassia-Zimtstangen und enthalten weniger Cumarin. Ceylon-Zimtstangen bestehen aus dünnen Zimtrindenblättern die mehrfach gerollt und gewickelt sind, sie bestehen also aus vielen dünnen Schichten. Cassia-Zimtstangen hingegen sind dick und werden nur einmal gerollt. 

Ich verwende die Gewürzmischung (noch) nicht für Tee, sondern ab sofort für alles andere, dass ich mit diesem Gewürz verfeinern möchte. Und da fallen mir schon ganz viele tolle Sachen ein! Ihr dürft gespannt sein was ich Euch alles in den kommenden Wochen präsentieren werde! Es lohnt sich!

Chaigewürz

Vor zwei Jahren: Chocolate Chip Cookies mit Pistazien, dunkler Schokolade und Rauchsalz

Vor drei Jahren: Orangen-Rotkohl mit Gorgonzola

Vor vier Jahren: Flan Tarte


Mornings begin with a cup of chai tea. At home loose tea. Just recently I discovered the perfect organic chai tea, which costs twice as much as the normal one, but therefore there are no flavours in it and it taste sensationell! At work I use tea bags, I prefer the chai by Yogi and Alnatura. Here organic is a must, since others only taste gruesome artifical. As chai tastes so yummy in all kind of dishes and drinks, I made my own spice mixture! I love the warming spicy taste so much!

Therefore I use a spice mill attached to my kenwood food processor. This is so handy and I already used it for spice mixtures for different indian dishes. If you don’t own a fancy machine like that you can also use a small spice grinder or coffee mill. Just make sure that no flavours are transferred from the previous milled food.

Here’s my trick to avoid that: Grind one tablespoon of plain rice beforehand. It neutralizes the flavours mostly and „cleans“ your mill/grinder. 

You don’t need any special spices, just make sure you use real ceylon cinnamon sticks. Those are from high quality in contrast to cassia cinnamon sticks and contain less cumarin. Ceylon cinnamon sticks are made from thin cinnamon rind and are rolled many times, so they consist of many thin layers. Cassia cinnamon sticks on the other side are made of thick rind and only rolled once!

I use the chai spice mixture not for my tea (yet), but for everything else, that I will spice up! I’m already thinking of so many possibilities. Stay and tuned for what I’ll present the next weeks! It will be totally worth it!

Chai Spice

Two years ago: chocolate chip cookies with pistachios, dark chocolate and smoked sea salt

Three years ago: red cabbage with orange and gorgonzola

Four years ago: flan tart

Frischkäsebällchen mit Kräutern und WalnüssenCream Cheese Balls with Herbs and Walnuts

Frischkäsebällchen mit Kräutern und Walnüssen
 
Einer der ersten Gedanken, nachdem wir wieder aus dem Urlaub zurück waren, war: „was bekommen die Nachbarn für 6-wöchiges Wohnung aufpassen und Blumen gießen“. Etwas Selbstgemachtes natürlich. Seit dem ich das tolle Buch von Nicole Stich Geschenkideen aus der Küche besitze ist die Frage glücklicherweise viel einfacher zu beantworten. Also kurz im Buch geschmökert und schon war die Sache klar: Kekse (allerdings die hochgepriesenen von der NY Times), Schoko-Müsli, selbstgebackenes Ciabatta und diese Frischkäsebällchen.
 
Frischkäsebällchen mit Kräutern und Walnüssen
 
Die Käsebällchen sind sehr lecker, besonders da ich sie noch mit verschiedenen (TK) Kräutern gemischt und sie in gehackten Walnüssen gewälzt habe. So sind es keine 0815 Käsebällchen mehr. Die Bällchen werden aus abgetropften 10%-igem griechischem oder türkischen Jogurt hergestellt. Alles sehr easy, man muss nur ein bisschen Zeit haben. Man kann den abgetropften Jogurt mit allem mischen was das Herz begehrt: Kräuter, Gewürze und sie dann in Samen oder gehackten Nüssen der Wahl und sogar gehackten Trockenfrüchten wälzen. So bekommt jeder seinen individuellen Käse, der ein schönes Geschenk abgibt oder auch beim nächsten Brunch mit Freunden Eindruck schindet.
 
Frischkäsebällchen mit Kräutern und Walnüssen
 
Frischkäsebällchen mit Kräutern und Walnüssen


Cream Cheese Balls with Herbs and Walnuts
 
One of the first thoughts I had, when we where back home after our vacation was: “ what is a good gift for our neighbours for sitting our apartment and caring for our plants for 6 weeks“. Something home made of course. Since I’m in possession of Nicole Stich’s fabulous book Geschenkideen aus der Küche (yet, only in German) this question is much more easy to answer. So after a brief look into the book it was clear: cookies (but the highly recommended ones from the NY Times), chocolate granola, home made ciabatta and these cream cheese balls.
 
Cream Cheese Balls with Herbs and Walnuts
 
These cream cheese balls are very delicate, especially after mixing in some (frozen) herbs and rolling them in chopped walnuts. Like this, they are a real delight. The cream cheese balls are made of Greek or Turkish yogurt containing 10 % fat, which is drained. The whole process takes some time, but is very easy. The drained yogurt can be mixed with everything you desire, such as herbs and spices and they can be rolled in seeds, chopped nuts or even chopped dried fruit. This way you get individual cream cheese balls, that are perfect as a gift or will impress your friends at your next brunch.
 
Cream Cheese Balls with Herbs and Walnuts
 
 
Cream Cheese Balls with Herbs and Walnuts

Selbstgemachte SchokoladentafelnHomemade Chocolate Bars

Dies ist mein Beitrag zum wundervollen kulinarischen Adventskalender, den Zorra zum wiederholten Mal ausrichtet. Ich bin dieses Jahr das erste Mal dabei und freu mich sehr darüber. Ich bin stolz ein Teil des Ganzen zu sein, vor allem wenn ich mir die bisherigen Beiträge so anschaue.

Kulinarischer Adventskalender 2011 - Türchen 13

 
Selbstgemachte Schokoladentafeln
 
Schon vor 2 Jahren habe ich mir ein kleines Büchlein samt Form fürs Schokoladentafelngießen gekauft. Erst als Geschenk gedacht, dann mir selber geschenkt. Wüsste auch nicht wer sowas sonst eigentlich schätzen weiß. Nur, nachdem ich gelesen habe, dass man die Schokolade temperieren muss mit Thermometer und so, da landete das Ganze erst mal bei dem anderen Küchenkram. Aber das temperieren ist wichtig, denn das ergibt den schönen matten Glanz und erhält den richtigen Schmelz.
 
Selbstgemachte Schokoladentafeln

Nun, dieses Jahr hab ich mich rangetraut und es war kein Nachteil! Ganz im Gegenteil. Es ist eine helle Freude wenn man die ersten eigenen Tafeln aus der Form kippt. Und soo schön sind sie, man will sie dann doch nicht mehr verschenken. Denn ein super Geschenk zu Weihnachten sind sie. Man kann jedermanns Wünsche erfüllen und Abneigungen aussparen. Und wenn ihr glutenfreie Kuvertüre (auf Dr. Oetker Kuvertüre sind jedenfalls keine weizenhaltigen Zutaten aufgelistet und enthält auch keine Spuren davon) verwendet, könnt ihr auch glutenfreie Schokolade machen. Das wird Augen zum Leuchten bringen.

Selbstgemachte Schokoladentafeln
 
Ausgefallene Vorstellungen? Immer rein damit in die Schokolade. 0815 kann man ja auch kaufen, Cashew mit Currypulver oder Pinienkerne mit Rosmarin nicht. Das waren meine ersten Tafeln, die ihr auch auf den Bildern seht.  Nur bitte keine Schokolade mit Chili. Das ist echt alt und das Zeug sollte wieder vom Markt verschwinden. Ich meine, das war schon vor 10 Jahren ein Trend. Ehrlich, er ist vorbei!
So, nun zurück zur Herstellung. Ihr braucht außer ein wenig Zeit vor allem eins: ein Thermometer. Ein digitales, das eine kurze Reaktionszeit hat ist zu empfehlen (gibt’s für ein paar Euronen). Bitte kein Fieberthermometer. Na gut die Tafelform ist auch ein Muss. Äußerst hilfreich ist auch ein Teigspatel.  Kürzlich hab ich gelesen, dass das in österreichisch „Gummihund“ heißt. Das finde ich eigentlich viel schöner als Teigspatel. Wenn ich mir das Wort merken könnte würde ich mich umtrainieren.
Selbstgemachte Schokoladentafeln
 
Vor einem Jahr: Eierlikör und Lebkuchen
Selbstgemachte Schokoladentafeln

This is my entry to the wonderful kulinarischen Adventskalender (culinary advent calendar), which Zorra organizes again. It’s the first participation for me and I’m very happy about it. I’m proud to be part of this calendar, especially when I look at the entries made so far.

Kulinarischer Adventskalender 2011 - Türchen 13

 
Already two years ago I bought a little book including a chocolate bar mould. First it was meant to be a gift, but then I gifted it to myself. I don’t even know who would appreciate it. But after I read that you have to temper the chocolate with a thermometer, it ended up with the other kitchen stuff. But the tempering is important, as it yields the beautiful matt surface und obtains the right melting.

Homemade Chocolate Bars

 So this year I gave it a try and it wasn’t to my disadvantage! Au contraire. It’s such a delight, when turning out the first bars from the mould. And they are so pretty, you don’t want to give them away as a gift no more. A perfect gift, that’s what they are. You can fulfil everyone’s wishes and spare the dislikes. And if you are using gluten free chocolate, you can also make gluten free chocolate bars!

Homemade Chocolate Bars

You have fancy ideas? No problem, just put them in the chocolate. Everyone can do ordinary. But not cashew with curry powder or pine nuts with rosemary! That were my first bars, which you also see on the photos. But do not use chili in your bars! Really that’s an old obsolete trend, which was trendy ten years ago. Honestly, it’s over.

Homemade Chocolate Bars

Back to the production. Besides some time you need one thing: a thermometer. A digital one, that has a short response time is recommended (costs just a few bucks). Don’t use a clinical thermometer! Well the bars mould is a must, too. And a silicon spatula is very helpful, too. I red recently that in Austria silicon spatula is called „Gummihund“, which can be translated as „rubber dog“. It’s my new favourite word for that tool.

Homemade Chocolate Bars

One year ago: Eggnog and Gingerbread

Homemade Chocolate Bars

Erdbeerlikör, Basilikum-Olivenöl & HolunderblütenessigStrawberry Liquor, Basil Olive Oil & Elderflower Vinegar

Update: Für die deutschen Rezepte  nach unten scrollen.

These beauties are my latest experiments.

Strawberry Liquor, Basil Olive Oil & Elderflower Vinegar

 This is the first time I’ve mixed them up. But I’m sure,  they will turn out great. Because how shouldn’t liquor, oil and vinegar with these ingredients turn out great?!

I’ve made liquor before. With elderflower or peaches. I made the elderflower one this year again. It’s perfect. So if you can still lay you hands on elderflowers, pick them immediately and make something special! We wanted to make even more, but the season here is already over.


Strawberry Liquor, Basil Olive Oil & Elderflower Vinegar

But so has the season of strawberries and basil begun.

Yesterday we went picking strawberries on a huge field. The fruits were delicious and we bought over 2 kilos for 6,50 Euros.

After coming home, I dived into the kitchen, ready to make jam and liquor. What a feast!

And so I’m looking forward to the raspberry season in 3-4 weeks. I can’t wait for them and even more jam!

Strawberry Liquor, Basil Olive Oil & Elderflower Vinegar

Vor einem Jahr: Zitronen-Rosmarin-Kekse

Strawberry Liquor, Basil Olive Oil & Elderflower Vinegar

These beauties are my latest experiments.  

Strawberry Liquor, Basil Olive Oil & Elderflower Vinegar

This is the first time I’ve mixed them up. But I’m sure,  they will turn out great. Because how shouldn’t liquor, oil and vinegar with these ingredients turn out great?! I’ve made liquor before. With elderflower or peaches. I made the elderflower one this year again. It’s perfect. So if you can still lay you hands on elderflowers, pick them immediately and make something special! We wanted to make even more, but the season here is already over.  

Strawberry Liquor, Basil Olive Oil & Elderflower Vinegar

But so has the season of strawberries and basil begun. Yesterday we went picking strawberries on a huge field. The fruits were delicious and we bought over 2 kilos for 6,50 Euros. After coming home, I dived into the kitchen, ready to make jam and liquor. What a feast! And so I’m looking forward to the raspberry season in 3-4 weeks. I can’t wait for them and even more jam!  

Strawberry Liquor, Basil Olive Oil & Elderflower Vinegar

One year ago: Lemon-Rosemary-Cookies

Strawberry Liquor, Basil Olive Oil & Elderflower Vinegar

Eierlikör & LebkuchenEggnog & Gingerbread

Update: Für das deutsche Rezept nach unten scrollen!

Last week I told you about some Christmas gifts I will make. Today I present you two of them. I highly recommend both. Either as a gift or just for yourself. Both recipes are made in no time and are very easy.

Eggnog & Gingerbread

 Although I bake and cook almost everything myself, I never made gingerbread or lebkuchen, as we call them in German (gingerbread is confusing for me, as the lebkuchen doesn’t contain any ginger…). I come from the lebkuchen city of Nürnberg, so I know the very good ones from the lebkuchen bakeries (not the cheap ones from the supermarkets) and I never had the guts to bake them myself. But then two things happened.

First I didn’t had the chance to buy or eat any lebkuchen from home, since there was no opportunity to be there. Second I bought a really wonderful book (sorry for all the English speakers). The book contains so many recipes for Christmas gifts (or gifts at all), Christmas cookies and even recipes for your Christmas dinner. It was love at first sight! There I discovered a lebkuchen recipe. They looked really good. A smaller version of my beloved ones from home. So I gave them a try. They are just perfect. No need to buy them anymore (ok, except the really good ones from the bakery). They are even better with chocolate icing. Or sugar icing. And they get better from day to day. It’s actually recommended, that you prepare them 1 to 2 weeks ahead. But then, you have to be careful, that you have some left for the gifts on Christmas.

Eggnog & Gingerbread

 It’s almost a tradition to make eggnog, as a gift for my grandmother for Christmas. There are not many things, that a 90-year-old-woman desires. But we all know she loves eggnog, so at least my aunt and me are giving eggnog as a gift to her. This year I tried a new recipe (which I also adapted from the book, I recommended above). And it is a hit! It balances perfect between the sweetness, the vanilla and the alcohol. It’s not too thick and not to thin. Just the right consistency. There is no sharpness of the alcohol in this eggnog. This is how I love it. I used normal corn schnapps, instead of the high-proof alcohol, listed in the recipe. With the right amount of the other ingredients, this was the key of the perfect eggnog.

Give your beloved ones a treat with those wonderful gifts or at least yourself and your family.

Happy baking!

Eggnog & Gingerbread

Last week I told you about some Christmas gifts I will make. Today I present you two of them. I highly recommend both. Either as a gift or just for yourself. Both recipes are made in no time and are very easy.

Eggnog & Gingerbread

 Although I bake and cook almost everything myself, I never made gingerbread or lebkuchen, as we call them in German (gingerbread is confusing for me, as the lebkuchen doesn’t contain any ginger…). I come from the lebkuchen city of Nürnberg, so I know the very good ones from the lebkuchen bakeries (not the cheap ones from the supermarkets) and I never had the guts to bake them myself. But then two things happened.

First I didn’t had the chance to buy or eat any lebkuchen from home, since there was no opportunity to be there. Second I bought a really wonderful book (sorry for all the English speakers). The book contains so many recipes for Christmas gifts (or gifts at all), Christmas cookies and even recipes for your Christmas dinner. It was love at first sight! There I discovered a lebkuchen recipe. They looked really good. A smaller version of my beloved ones from home. So I gave them a try. They are just perfect. No need to buy them anymore (ok, except the really good ones from the bakery). They are even better with chocolate icing. Or sugar icing. And they get better from day to day. It’s actually recommended, that you prepare them 1 to 2 weeks ahead. But then, you have to be careful, that you have some left for the gifts on Christmas.

Eggnog & Gingerbread

 It’s almost a tradition to make eggnog, as a gift for my grandmother for Christmas. There are not many things, that a 90-year-old-woman desires. But we all know she loves eggnog, so at least my aunt and me are giving eggnog as a gift to her. This year I tried a new recipe (which I also adapted from the book, I recommended above). And it is a hit! It balances perfect between the sweetness, the vanilla and the alcohol. It’s not too thick and not to thin. Just the right consistency. There is no sharpness of the alcohol in this eggnog. This is how I love it. I used normal corn schnapps, instead of the high-proof alcohol, listed in the recipe. With the right amount of the other ingredients, this was the key of the perfect eggnog.

Give your beloved ones a treat with those wonderful gifts or at least yourself and your family.

Happy baking!


Eggnog & Gingerbread