So jetzt kommt’s: Das Hammer-Rezept! Das Rezept des Sommers, ach was sag ich, des Jahres!
Ich bin ja ein echter Tomatenketchup-Liebhaber. Der Stoff meiner Kindheit gehört für mich immer noch zu Bratwurst und Fischstäbchen (ja ich esse gerne Fischstäbchen!). Und der Stoff meiner Kindheit wird seit jeher nur von einer Weltmarke gekauft, die so heißt wie ein Verwandter.
Ich mach ja gerne alles selber, aber bei Ketchup war ich immer skeptisch. Ich dachte das kommt nie an das Original ran.
Letzte Woche hab ich es gewagt, sogar zwei Rezepte parallel gekocht zum Vergleich. Es war aber ziemlich schnell klar, dass das eine Rezepte verliert… Paprikapulver im Ketchup ist einfach voll daneben.
Das andere jedoch ließ meine Augen aufleuchten! Es schmeckte wie das Original, nur noch einen Ticken besser. Es war voller, intensiver und trotzdem schmeckte es wie Ketchup schmecken soll!
Ich fürchte bei uns wird es nur noch hausgemachten Tomatenketchup geben in Zukunft. Ja Befürchtung, weil man nämlich einiges an Tomaten braucht für das gute Zeugs. Man kann etwa sagen, dass das Endergebnis einem Drittel der eingesetzten Tomatenmenge entspricht. Das liegt einfach daran, dass nach dem Pürieren die Pampe durch ein Sieb gestrichen werden muss, denn Gemüsestückchen und Kerne haben in einem Ketchup absolut nichts verloren und dann will man ja auch die samtig-seidige Konsistenz haben. Da hilft nur eins: Einkochen was das Zeugs hält!
Zur Zeit gibt es auch die schönsten deutschen Tomaten zu günstigen Preisen. Bei uns sogar tolle San Marzano’s für 2,40 €/kg! Solltet ihr diese oder Ochsenherztomaten zu guten Preisen bekommen, schlagt zu und verwendet sie, da sie weniger Kerne und Flüssigkeit enthalten, als normale Tomaten.
Also kauft Tomaten, gleich ein paar Kilo und macht Euch an die Herstellung, es kostet nicht viel Arbeit, sondern nur etwas Zeit. Das Ergebnis könnt ihr dafür 1 Jahr lang genießen, vorrausgesetzt ihr habt genug gekocht!

Vor einem Jahr: Leinsamenbrot
Vor zwei Jahren: Die besten Chocolate Chip Cookies
Vor drei Jahren: Death by Chocolate
Selbstgemachtes Tomatenketchup
nach einem Rezept aus Geschenkideen aus der Küche von Nicole Stich
ergibt ca. 350 ml
Zutaten:
-
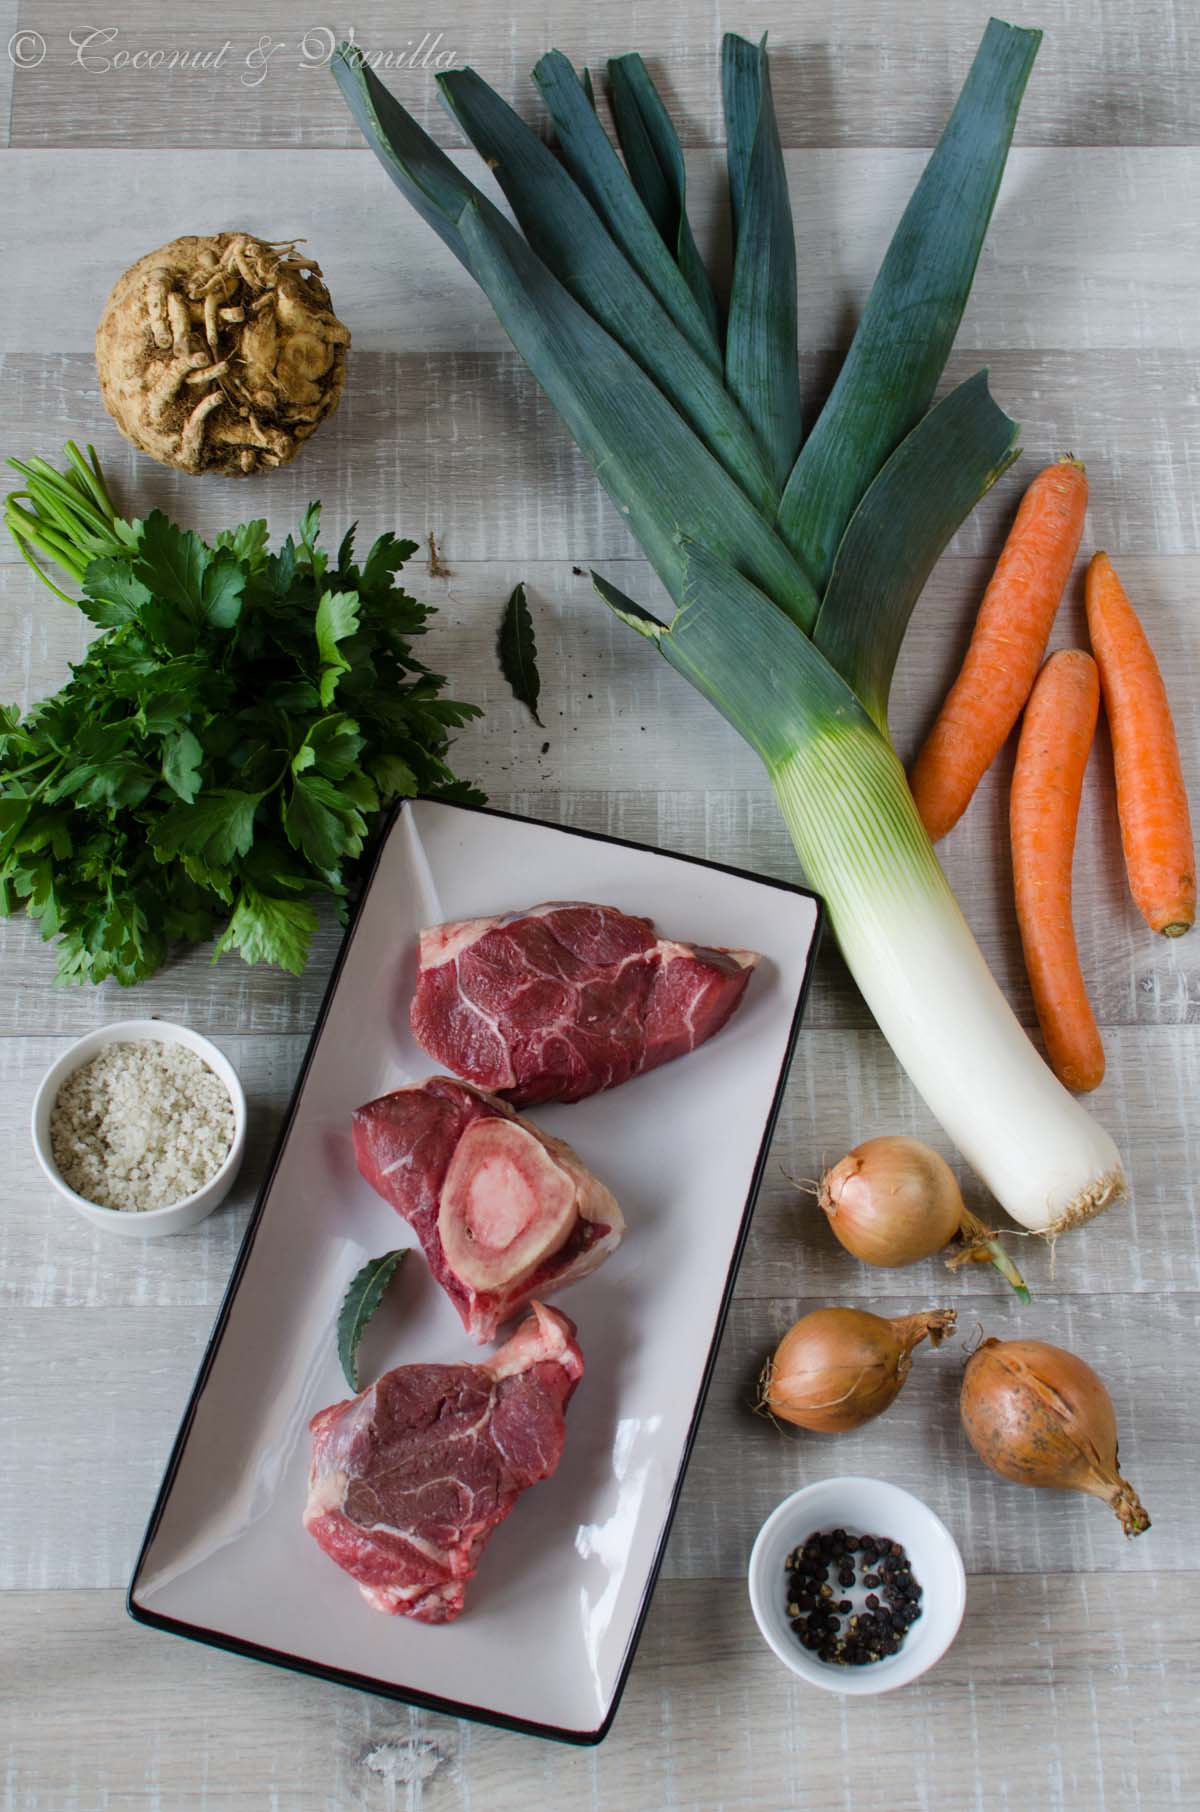
1 kg reife feste und aromatische Tomaten (am besten San Marzano oder Ochsenherz)
-
2cm Ingwer, geschält und in Scheiben geschnitten
-
25 schwarze Pfefferkörner
-
4 Lorbeerblätter (ich nehme frische)
-
4 Nelken
-
1/2 kleinen Knollensellerie, geschält
-
2 Knoblauchzehen, geschält und fein gehackt
-
1 Zwiebeln, geschält und fein gehackt
-
1/2 große rote Chilischote
-
5-6 Scheibchen getrocknete Steinpilze (oder 1/2 TL gemahlen)
-
6 EL Rohrohrzucker/Muscovado (ich nehme Vollrohrzucker)
-
200 ml Weißweinessig
-
1 TL feines Meersalz
Unten in die Tomaten Kreuze einschneiden und in einer großen Schüssel mit kochendem Wasser übergießen. 1 Minute ziehen lassen, die Tomaten sollten völlig mit Wasser bedeckt sein. Nicht länger ziehen lassen, sie werden sonst sehr weich (sie garen) und lassen sich schlechter schneiden.
Die Tomaten in ein Sieb abgießen und mit kaltem Wasser abkühlen. Die Haut mit einem kleinen Messer abziehen (wenn man sehr viele Tomaten verarbeitet, finde ich die Verwendung von Einmalhandschuhen praktisch, dann weichen die Hände nicht so auf, es ist nicht so flutschig und sie werden nicht rot). Tomaten vierteln und den Strunk entfernen.
Die Tomaten in eine großen breiten Topf oder eine hohe Edelstahlpfanne geben.
Den Ingwer mit den Pfefferkörnern, dem Lorbeer und Nelken in einen Teefilter geben und zubinden. Zu den Tomaten geben.
Den Sellerie in 1/2 cm dicke Scheiben schneiden und mit den Zwiebeln und dem Knoblauch ebenfalls zu den Tomaten geben.
Die Chilischote in dünne Ringe schneiden und mit den restlichen Zutaten zu den Tomaten geben.
Den Inhalt aufkochen und umrühren. Bei kleiner bis mittlerer Hitze (bei mir 3 von 9 auf Ceran) 30 Minuten köcheln lassen.
Die Selleriestücke und das Gewürzsäckchen entfernen.
Die Tomatensauce mit einem Pürierstab gut durchmixen. Ein großes feines Sieb über eine große Schüssel hängen und die Tomatensauce mit einem Silikonspatel durch das Sieb passieren. Im Sieb sollte ein recht festes Mus übrig bleiben. Nicht vergessen das Tomatenpüree unten vom Sieb abzuschaben.
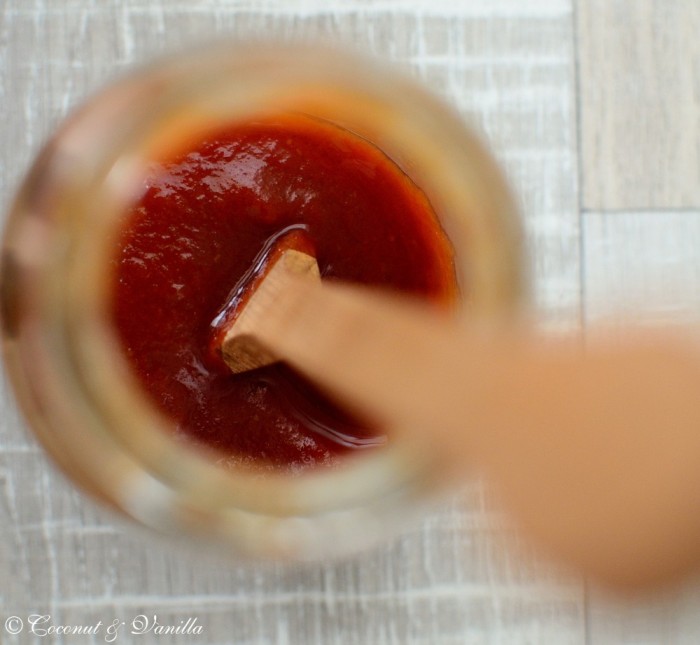
Topf/Pfanne kurz ausspülen, damit die passierte Sauce nicht wieder mit Kernen verunreinigt wird. Die Sauce wieder in den Topf geben und bei mittlerer Hitze (5-4 von 9 auf Ceran) einkochen lassen, bis eine sämige Ketchupkonsistenz erreicht ist. Das kann je nach Menge 30 Minuten bis 1 Stunde dauern (evtl. auch länger, da ich richtig große Mengen bisher nicht ausprobiert habe). Dabei immer wieder mit einem Silikonspatel umrühren und die Sauce vom Boden schaben. Das Ketchup läuft am Ende nicht mehr einfach vom Spatel, sondern sollte dickflüssig tropfen.
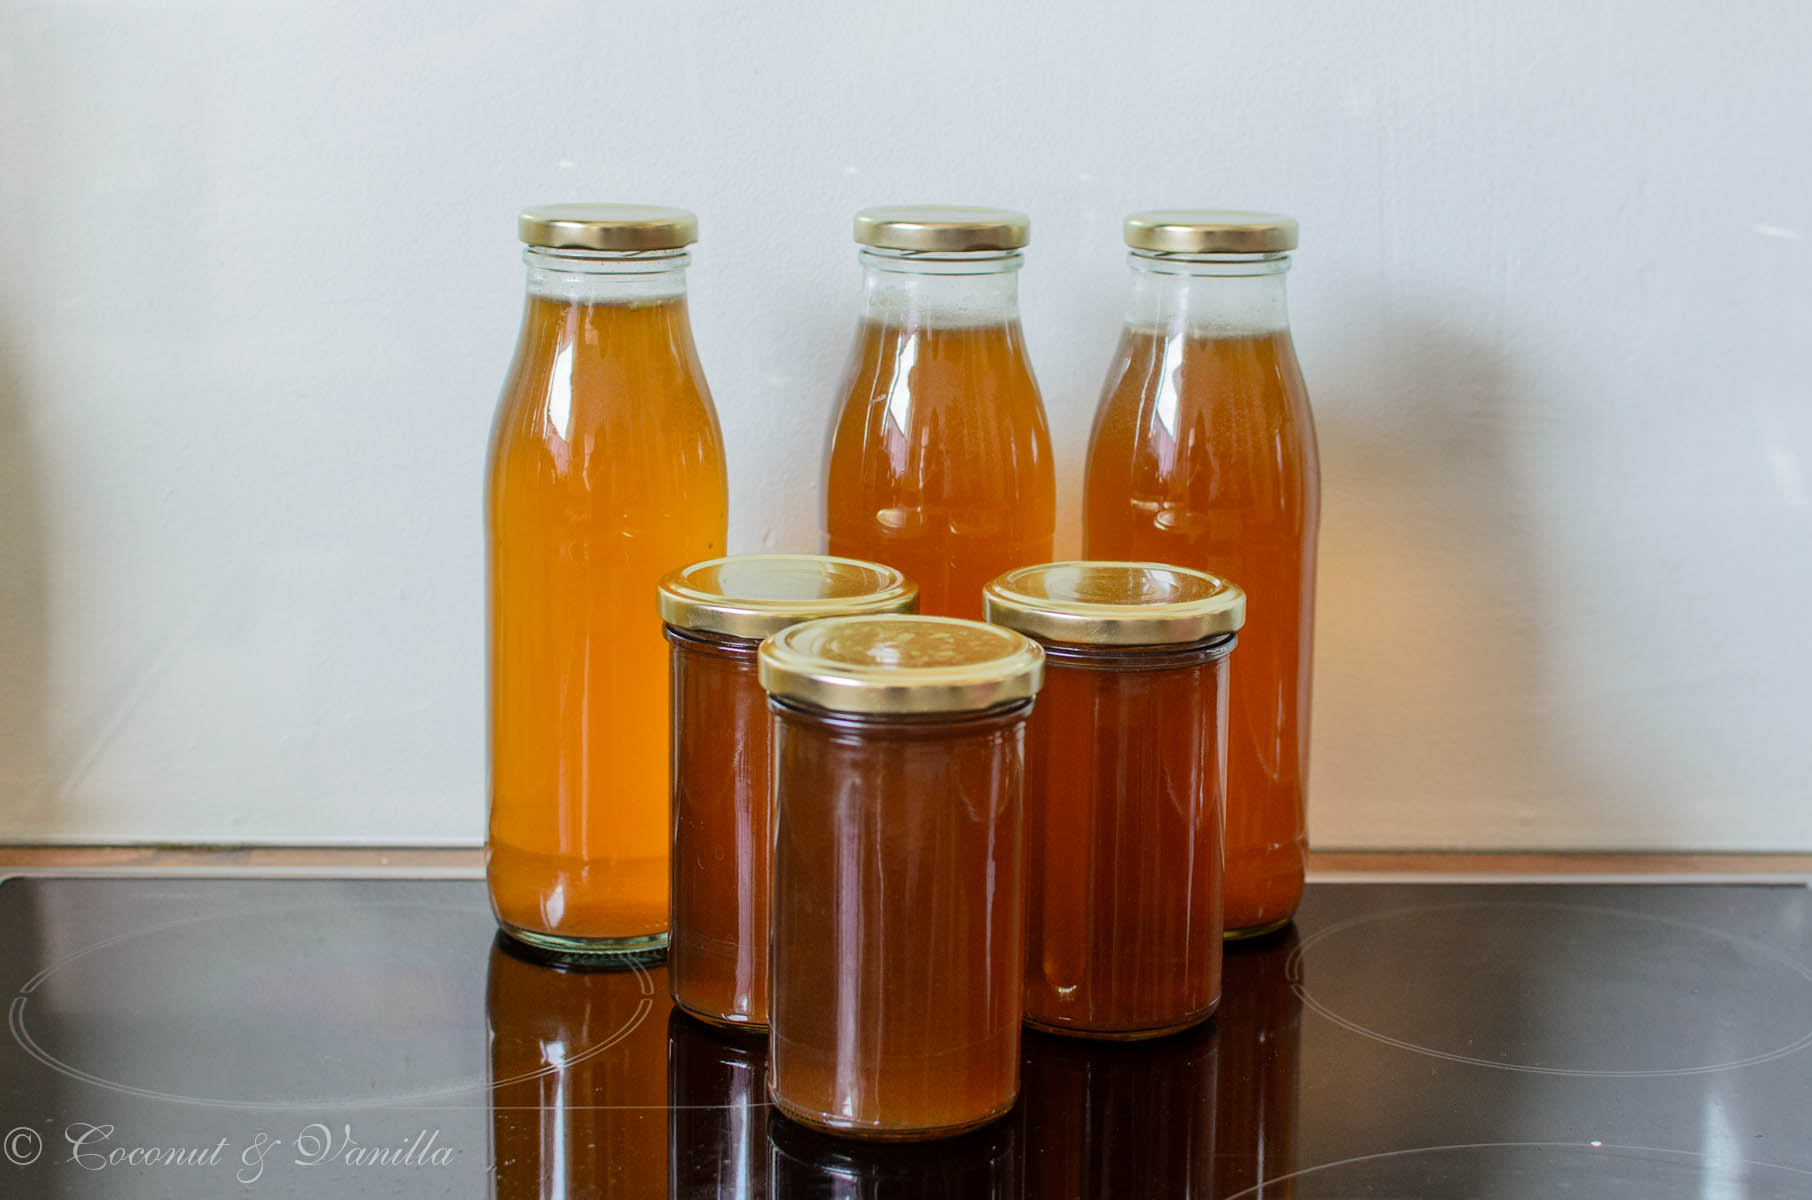
Das Ketchup in kleine sterilisierte Flaschen füllen und gut verschließen.
Hält sich verschlossen bis zur nächsten Tomatenernte. Geöffnet im Kühlschrank möglichst schnell verbrauchen (bisher keine Erfahrungswerte), daher kleine Flaschen verwenden (ich: 250 ml).


I will now present you the best recipe of the summer, what am I saying, the year!
I’m a really tomato ketchup lover! The stuff of my childhood still belongs to bratwurst and fish sticks for me! And the stuff of my childhood is bought from a global brand ever since, which is named like a relative of mine.
You know I make a lot of things myself, but I was always sceptical about making ketchup. I thought it could never reach the original.
Last week I gave it a try. I even cooked two recipes simultaneously for comparing. But after a short time it was already clear that one recipe is a loser… because powdered paprika in ketchup is just completely wrong.
But the other recipe made my eyes lighten up! It tasted like the original, but even a bit better. It was more complex, intensive and still tasted like ketchup has to taste!
I’m afraid we will only eat homemade tomato ketchup anymore. Afraid? Yes, because you will need A LOT of tomatoes for this delicious stuff. You will need the tripled amount of tomatoes, that you want in ketchup. That’s because after pureeing the sauce, you have to press it through a sieve to remove the coarser rests of the vegetables and the seeds, because you don’t want to have that in your ketchup! Finally a ketchup needs to have that velvety silky texture. And you will only get it by reducing the sauce.
The most beautiful tasty German tomatoes are now in season for sensational prices. I’ve already seen awesome San Marzano on our market for 2,40 €/kg! If you find these or giant ox heart tomatoes, buy and use these, because they have less seeds and liquid and more flesh as normal tomatoes.
Go, buy tomatoes, a few kilo right away and make ketchup! It doesn’t make a lot of work, it just needs some time. Therefore you can enjoy the result one year long, given that you made enough!
One year ago: Flaxseed Sourdough Bread
Two years ago: The best Chocolate Chip Cookies
Three years ago: Death by Chocolate
Homemade Tomato Ketchup
adapted from Geschenkideen aus der Küche by Nicole Stich
yields about 350ml
Ingredients:
-
1 kg ripe, firm and aromatic tomatoes (best San Marzano or giant ox heart)
-
2 cm ginger, peeled and sliced
-
25 black peppercorns
-
4 bay leaves
-
4 cloves
-
1/2 small celeriac, peeled
-
2 garlic cloves, peeled and finely diced
-
1 onion, peeled and finely diced
-
1/2 large red chilli
-
5-6 slices dried porcini (or 1/2 tsp ground)
-
6 Tbsp muscovado sugar
-
200 ml white vine vinegar
-
1 tsp fine sea salt
Cut an X in the bottom of each tomato, place in a large bowl and pour boiling water over them. Let them rest for 1 minute. The tomatoes should be completely in the water. And don’t let them rest too long, as they will soften and are more difficult to chop.
Pour them into a colander and rinse with cold water in order to cool them down. Remove the skin with a small knife (when I am handling a lot of tomatoes, I like to work with disposable gloves, since the hands won’t get soft and wrinkled by the water, it’s not that slippery and the hands won’t get red). Quarter the tomatoes and remove the stems.
Place the tomatoes in a large broad pot or a stainless steel pan with a high rim.
Put the ginger, peppercorns, bay leaves and the cloves in a tea bag and seal it with kitchen twine. Add to the tomatoes.
Slice the celeriac 1/2 cm thick and the chilli into thin rings. Add both to the tomatoes, as well as the rest of the ingredients.
Bring to the boil and let it simmer on low to medium heat for 30 minutes.
Remove the celeriac and the spice bag.
Purée the tomato sauce finely. Place a large mesh strainer over a large bowl and press the sauce through it to remove any seeds and vegetable bits. In the sieve should be remaining a firm mush. Don’t forget to use the purée under the sieve.
Wash the pan/pot shortly to remove any seeds. Place the sauce into the pan/pot and boil it down on middle heat for 30 to 60 minutes, depending on the amount of sauce you have (it might be taking even longer for really large amounts, I didn’t tested it, yet). Stir with a silicone spatula every now an then and scrape the bottom of the pan. In the end the ketchup shouldn’t be running from the spatula, but dripping thickly off it.
Fill the ketchup in small sterilized bottles and close them tightly.
Keeps closed until the next tomato harvest. Should be consumed as fast as you can, when opened and kept in the fridge (I don’t have any experience by now), because of that use small bottles (I use 250 ml).

![[:de]Back to Basics: selbstgemachte Weizentortillas[:en]Back to Basics: Homemade Wheat Flour Tortillas[:]](https://coconutandvanilla.com/wp-content/uploads/2013/09/Weizentortillas_banner.jpg)