
Jetzt in den Wochen vor Weihnachten gibt es an einem Stand auf dem Markt auch Wild. Manchmal dies, manchmal das. Vor Kurzem entdeckte ich dort Wildhasen, den wir gleich mitnahmen. Die Gelegenheit kommt nicht oft. Dahinter standen zwei Tüten mit Rehabschnitten und -knochen, die ich schon interessiert beäugte. Nachdem wir noch eine Runde durch die Läden machten, musste ich sie noch haben. Und ein Glück, denn bisher hab ich dort keine mehr gesehen.
Am gleichen Wochenende hieß es also Wildfond kochen und einmachen. Da es auch für mich das erste Mal war, wollte ich mich kurz im Internet informieren um etwaige Zutaten (außergewöhnliches) und Kochzeit. Kurz war gut. Das Internet gab nicht viel her. Von 2-6 Stunden alles dabei. Kam mir aber auch etwas wenig vor. Facebook befragt. Arthurs Tochter half mit der konkreten Angabe 12 Stunden weiter. Also dann 12 Stunden. Und es hat dem Fond nicht geschadet.
Wildfond braucht man vielleicht nichts so häufig, aber wenn ja was macht man dann? Gut man kann einen überteuerten Fond kaufen. Da kostet das Glas mehr, als die Abschnitte zum Kochen. Und dann sind auch noch Zutaten drin, die mit Fond nichts zu tun haben.
Ich habe mit einmal Kochen 13 Gläser Fond eingekocht. Das hält ne Weile. Aber wenn man es danach auch noch schön im Backofen einmacht, hält sich das auch noch ewig (naja fast).
Und für alle die sich fragen, wie nun Wildfond kochen und einmachen im Backofen funktioniert, liefere ich heute eine pipifax einfache Anleitung dafür. Und schon steht dem leckeren Sößchen, egal zu welchem Wildfleisch, nichts mehr entgegen.

- 2-3 kg Knochen mit anhaftendem Fleisch von Wildfleisch (ich hatte Reh)
- Butterschmalz
- 1 Stange Lauch
- 1 Knollensellerie
- Stängel von 1 Bund Petersilie
- 2 Möhren
- 3 Zwiebeln
- 1 EL Tomatenmark
- 1 Flasche Rotwein (0,75 l)
- 5 Wacholderbeeren
- 1 Lorbeerblatt
- 1/2 TL Pfefferkörner
- 5 l Wasser
Gemüse waschen, Sellerie, Zwiebeln und Möhren schälen. Das Gemüse in Stücke schneiden von 1-2 cm.
Das Butterschmalz in einem Bräter auf hoher Hitze erhitzen. Ein Bräter ist besser geeignet als ein Kochtopf, da die Fläche zum Anbraten der Knochen größer ist.
Wenn das Schmalz heiß ist, die Knochen dazugeben und kräftig anbraten. Das kann ne Weile dauern, bis sie rundherum braun und eben angebraten sind.
Nun das Tomatenmark unterrühren. Anschließend das Gemüse und die Petersilienstängel dazugeben und mit anrösten. Das dauert 5-10 Minuten.
Nun alles mit etwa einem Drittel Rotwein ablöschen. Verdampfen und Einkochen lassen. Ist das Drittel nahezu weg (das geht verhältnismäßig schnell), das nächste Drittel dazu. verfahren wie zuvor und mit dem letzten Drittel Rotwein ebenso.
Dieses ganze Prozedere kann man auch wenn man möchte im Backofen im Bräter oder in einer Bratreine machen. Ist mir aber zu umständlich, ich arbeite lieber auf dem Herd.
Jetzt holt man den größten Kochtopf raus den man hat. Meiner fasst 8,5 l und er war gerade ausreichend. Beim Kalbsfond kürzlich hab ich mir einen größeren gewünscht. Wenn man einen besonders großen Bräter hat, kann man den natürlich auch weiter benutzen. Meiner fasst dafür einfach zu wenig.
Man kann den Topf schon mal auf mittlerer Hitze auf den Herd stellen. Nun schaufelt man die Knochen und das Gemüse in den Topf um. Für die Knochen am besten eine Zange benutzen. Zum Schluss die verblieben Flüssigkeit hinüberkippen. Wenn der Topf mitsamt Inhalt wieder heiß ist, gibt man das Wasser hinzu. Ich habe 5 l hinzugegeben, dann war mein Topf voll. 1-2 l mehr schaden aber auch nicht, einreduzieren kann man ja am Ende immer noch. Jetzt gibt man noch das Lorbeerblatt, den Wacholder und den Pfeffer dazu. Ich hab es dazu in einen Teebeutel gepackt, so findet man alles wieder. Ist hier aber eigentlich unnötig, denn nachher muss sowieso alles durch’s Sieb. Wer keinen Wacholder mag, kann ihn auch weglassen, ich habe davon allerdings nichts gemerkt.
Jetzt bringt man den ganzen Topfinhalt zum köcheln und lässt ihn auf kleiner Stufe 12 Stunden vor sich hin simmern. Man kann den Fond also auch abends ansetzen und über Nacht simmern lassen.
Nach den 12 Stunden lässt man den Fond abkühlen, damit sich das Fett absetzen kann. Am nächsten Tag hat man dann eine schöne Fettschicht auf dem Fond schwimmen, die man prima mit einem Löffel abnehmen kann. Also Fett weglöffeln. Eine große Schüssel (evtl. auch zwei) bereitstellen und ein sehr feines Sieb darüber hängen. Anschließend die Knochen und das grobe Gemüse aus dem Fond holen. Zwischendrin immer mal wieder Fond durch das Sieb in die Schüssel gießen. Der Fond enthält nun keine groben Stücke mehr. Wer mag kann ihn jetzt noch zusätzlich durch ein Sieb gießen, das mit einem Mull-, Käse-, feinem Baumwolltuch (das Tuch nie mit Weichspüler waschen!) ausgelegt ist, um feinere Partikel aus dem Fond zu entfernen.
Ich mache den Fond jetzt nochmal lauwarm, um ihn abzuschmecken. Er verträgt dabei nochmal ordentlich Salz (ein paar Esslöffel). Keine Angst, wenn er am Anfang noch etwas fad schmeckt, nach der richtigen Menge Salz schmeckt’s!
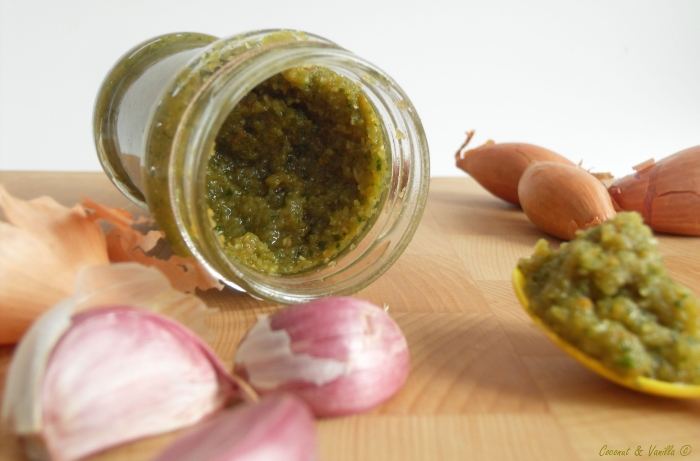
Den Fond nun in Twist-Off Gläser füllen und verschließen. Die Gläser in die Fettpfanne im Backofen stellen (unterste Schiene). Die Gläser samt Inhalt sind kalt, also kaltes Wasser angießen (ist der Inhalt warm/heiß, warmes/heißes Wasser angießen), ca. 1-2 cm. Den Backofen auf 180° C Ober- und Unterhitze stellen. Beginnt der Fond in den Gläsern zu perlen, den Ofen ausschalten, aber nicht öffnen. 30 Minuten im Ofen stehen lassen. Anschließend können die Gläser entnommen werden. Auf Tüchern abkühlen lassen. Überprüfen, ob sich die Deckel nach innen gezogen haben und somit ein Vakuum entstanden ist.
Der Fond ist somit mindestens 1 Jahr haltbar.


Now, in the weeks before christmas a market stall on our market has game, too. Sometimes this, sometimes that. Recently we spotted some wild rabbit there, which we immediately bought. Not an everyday opportunity. Behind it, two bags with venison parures and bones, which I already eyed interested. After we made the curcuit in the shops, I had to have them. And that was wise, since I didn’t see some again there.
So on the same weekend cooking and preserving stock was the matter. Since it was the first time for me, too, I searched the internet for some informations about ingredients (something special?) and the cooking time. But the internet was rare. 2-6 hours, everything was given. So asking Facebook. Arthurs Tochter helped me with the precise information: 12 hours. So 12 hours then. And it didn’t do any harm to the game stock!
There’s not so much need for game stock, but when, what to do then? Well, you can buy one, which costs as much as the two bags bones I bought. And then there are ingredients listed, that have nothing to do with stock.
I made 13 glasses of stock with this batch. That’s a nice supply. But if you’re preserving them in the oven, these will maintain forever (well almost).
And if you’re now wondering how to make game stock and how to preserve it in you oven, I will show you an easy peasy instruction how to. So nothing stands in the way for your delicious sauce, accompanying your next game dish.
One year ago: Scottish Shortbread
Game Stock
- 2-3 kg bones with meat attached from game (I had venison)
- clarified butter
- 2 carrots
- 1 leek
- 1 root celery
- 3 onions
- 1 Tbsp tomato paste
- 1 bottle red wine (0,75 l)
- 5 juniper berries
- 1 bay leaf
- 1/2 tsp peppercorns
- 5 l water
Clean the vegetables. Peel the celery, carrots and onions. Cut into 1-2 cm pieces.
On high heat, heat the clarified butter in a dutch oven. A dutch oven is more suitable than a cooking pot, because the surface for roasting is larger.
When the clarified butter is hot, add the bone and sear them. This may take a while, until they are browned all around.
Now stir in the tomato paste and add the vegetables as well as the parsley stems. Sear as well. This takes 5-10 minutes.
Deglaze with one third of the red wine. When it’s reduced, add the next third (that step doesn’t take long). Let it reduce again and add the last third wine. Reduce again.
This whole procedure can also be done in the oven in a roasting pan or the dutch oven. But as it is too laborious for me, I leave it to you.
Now take out the largest cooking pot you own. Mine holds up to 8,5 litres and it was just sufficient. Last time I made veal stock, I wished I own a larger one. If your dutch oven is large enough, you can surely use it. Mine is just too small.
Heat the pot on middle heat. Shovel the bones and the vegetables in the pot. For the bones a tong is very usable. In the end pour the remaining liquid in the pot. Heat the pot with its content, then add the water. I added 5 litres, then my pot was almost filled to the brim. 1-2 litres more won’t do any harm. You can still reduce it in the end. Add the bay leaf, the juniper berries and the peppercorns. If you don’t like juniper berries, leave them out, but I didn’t noticed the taste.
Now bring the stock to a simmer and leave it like that on low heat for 12 hours. You can also leave it overnight.
After 12 hours let the stock cool, so the fat can separate from the water. On the next day, a really nice layer of fat swims on the stock, which can be easily removed with a spoon. So spoon the fat out! Prepare one (or even two) bowls with a very fine mesh strainer on top. Remove the bones and the vegetables from the stock, then pour some stock liquid through the mesh strainer. Now the stock doesn’t contain any coarse bites. If you want to remove any finer particles from the stock, pour it again through a mesh strainer, layered with a fine cheesecloth.
Now I heat the stock again on low heat for seasoning. Don’t be worried if the stock taste lame in the beginning, it needs a good amount of salt (several tablespoons), but then it tastes!
Fill the stock in twist-off jars and close them. Put the jars in the drip pan in the lower part of the oven. Add cold water, 1-2 cm, because the content of the jars is cold (if the content is warm/hot, add warm/hot water). Heat the oven to 180° C top and bottom heat. When bubbles are forming in in the stock, shut down the oven, but do not open it! Let the jars in the oven for 30 minutes. Now they can be removed and cooled on cloths. Check if a vacuum has formed: the lids should be drawn a bit towards the inside of the jars.
The stock is at least best before one year.