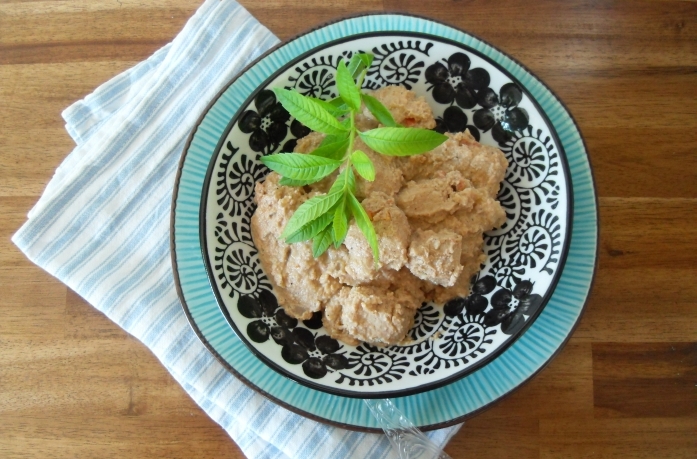
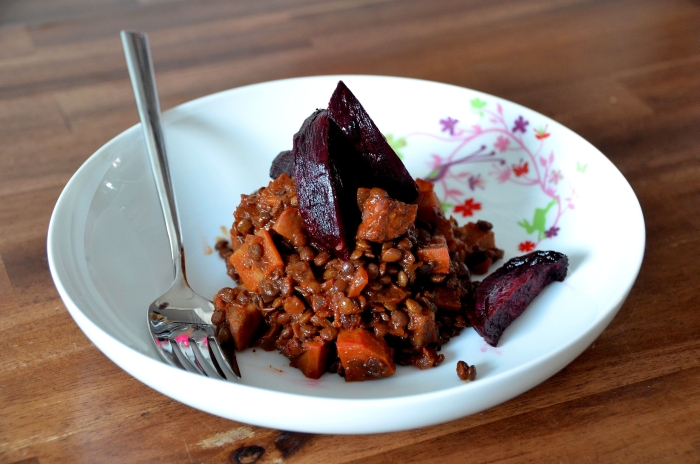

Das ist so richtig schönes Wohlfühlessen für mich! Ich liebe alles in diesem Gericht: Linsen, Cabanossi (die man für die vegetarische Variante natürlich einfach weglassen kann) und im Ofen geröstete Rote Beete, die dadurch am besten schmeckt. Verfeinert mit einem ordentlichen Schluck Rotwein, passierten Tomaten, Karotten- und Selleriewürfeln, Oregano, geräuchertem Paprikapulver (wichtig, da es ein unvergleichliches Aroma gibt) und Chili.
Belugalinsen sehen besonders schön aus, nämlich wie Belugakaviar: klein und schwarz. Aber sie schmecken auch besonders lecker und vor allem behalten sie ihre Form auch noch wenn sie gegart sind. Bei mir müssen sie noch etwas Biss haben. Die Zutaten in diesem Gericht werden durch das Kochen wie eine Einheit. Es gibt keine richtige Soße, die ist eher dicklich geworden und umgibt (großzügig) die Zutaten. Eine kohlenhydrathaltige Sättigungsbeilage ist hierbei nicht von Nöten, man kann die Leckerei auch gleich aus dem Topf löffeln.

Dadurch, dass wir 6 Wochen im Urlaub waren, habe ich im Gegensatz zu den Daheimgebliebenen das Wintergemüse noch nicht über. Ein echter Vorteil (obwohl ich mich trotzdem auf frisches Frühlingsgemüse freue)! Diesen Herbst sind wir sowieso schon zu großen Rote Beete Fans geworden. Früher kannte ich sie auch nur als Salat und habe sie schon da geliebt! Inzwischen haben wir schon viele Rezepte ausprobiert und alles hat uns begeistert. Am besten ist aber immer noch das einfache Rösten im Ofen mit Olivenöl und Salz, so wie sie als „Sahnehaube“ in diesem Rezept verwendet werden.

Vor einem Jahr: Haferflorentiner
Belugalinsen mit Cabanossi und Ofen-Rote Beete
reicht für 2-3 Personen
Zutaten:
-
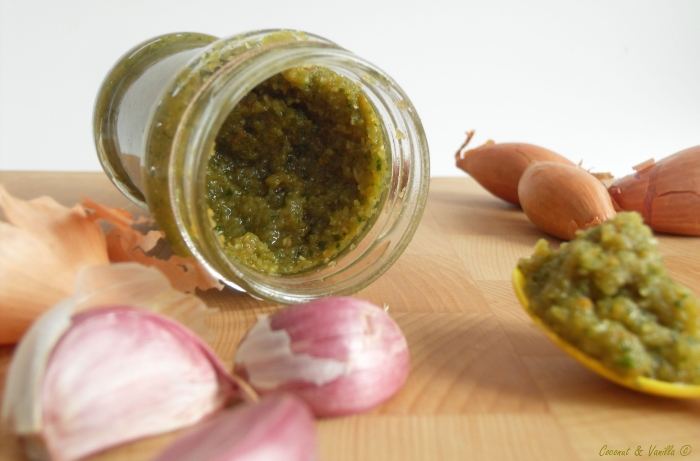
1 kleine Zwiebel, geschält
-
1 Knoblauchzehe, geschält
-
100 g Belugalinsen
-
Olivenöl
-
150 ml trockener Rotwein
-
100 g passierte Tomaten
-
2 Karotten, geschält
-
1/2 kleiner Knollensellerie, geschält
-
1 TL getrockneter Oregano (mehr bei frischem)
-
10 cm Stück Cabanossi
-
1/2 TL geräuchertes Paprikapulver
-
1/2 TL mittelscharfes Chilipulver
-
Salz & Pfeffer
-
1 große Rote Beete, geschält (dünne Plastikhandschuhe verwenden)
-
Olivenöl
-
1/2 TL grobes Meersalz
Den Ofen auf 180° C vorheizen.
Die Knoblauchzehe fein hacken. Die Zwiebel in 0,5 cm große Würfelchen schneiden. Karotten und Sellerie in 1,5 cm große Würfel schneiden.
Olivenöl in einem mittelgroßen Topf erhitzen. Die Zwiebel und den Knoblauch bei mittlerer Hitze ca. 3 Minuten anschwitzen. Dann die Linsen dazu, kurz mit anschwitzen. Mit dem Rotwein ablöschen und zur Hälfte einreduzieren lassen. Dann das Tomatenpüree dazu, ebenso die Gemüsewürfel und den Oregano (frischen am Ende dazugeben). Für 30-40 Minuten auf kleiner Hitze köcheln lassen. Wenn nötig etwas Wasser dazu (die Linsen saugen ganz schön was auf).
Die Rote Beete in Stifte mit 1,5 cm Dicke schneiden. In einer Auflaufform mit Olivenöl und dem groben Meersalz vermengen. Etwa 20 Minuten backen bis die Rote Beete gar ist, aber noch Biss hat.
Immer wieder einen Blick auf die Linsen werfen, ob sie Wasser brauchen. Ich hab insgesamt nur etwa 50 ml dazugeben. Am Ende soll nicht viel Sauce übrigbleiben und die die da ist, soll sehr dick sein.
Die Cabanossi der Länge nach vierteln und in gleichgroße Stücke schneiden.
Wenn die Linsen gar sind – sie sollten dabei immer noch etwas Biss haben – von der Herdplatte nehmen und die Cabanossi dazugeben. Mit dem geräuchertem Paprikapulver, dem Chili und Salz und Pfeffer abschmecken.
Die Linsen mit der gerösteten Rote Beete servieren.
This is my perfect comfort food! I love every detail in this dish: the lentils, the cabanossi (feel free to omit these for a vegetarian version, it’s still great then) and roasted beetroots, which is the best way to make them. Refined with a decent portion of red wine, pureed tomatoes, carrot and celeriac, oregano, smoked paprika (a great ingredients, because it gives dishes an extraordinary taste) and chilli.
Beluga lentils are beautiful, as they look like beluga caviar: small and black. But they taste also very delicious and they keep their shape very well while cooking. When I cook them they still need to be a bit al dente. The ingredients in this dish will melt together. The sauce will be very thick and surrounds the ingredients. A carbon hydrated side dish isn’t needed here, as you can just eat it by the spoon out of the pot.
As we spent 6 weeks in Asia, I’m not yet sick of winter vegetables. A real advantage (of course I’m looking forward to fresh spring vegetables)! This autumn we became huge fans of beetroots. In the past I’ve just known beetroots as salad, which then I already loved! In the mean time we tried a lot of recipes with beetroots and were delighted by all of them. But best is still to roast them in the oven with olive oil and salt, as I made it for this recipe.
One year ago: Oat Florentines
Beluga Lentils with Cabanossi and Beetroots
Serves 2-3
Ingredients:
-
1 small onion, peeled
-
1 garlic clove, peeled
-
100 g beluga lentils
-
olive oil
-
150 ml dry red wine
-
100 g pureed tomatoes
-
2 carrots, peeled
-
1/2 small celeriac, peeled
-
1 tsp dried oregano (or more if you use fresh)
-
10 cm piece cabanossi
-
1/2 tsp smoked paprika
-
1/2 tsp medium spicy chilli
-
salt & pepper
-
1 large beetroot, peeled (use those thin rubber gloves)
-
olive oil
-
1/2 tsp coarse sea salt
Preheat the oven to 180° C.
Finely chop the garlic clove. Chop the onion. Dice the carrots and the celeriac into 1,5 cm pieces.
Heat some olive oil in a medium large pot. Add the garlic and onion, when hot. Sautee them at medium heat, after 3 minutes add the lentils. Give it a stir and add the red wine. Let it cook, until half the wine is reduced, then add the tomato puree. Add the diced vegetables and the oregano (add fresh one in the end). Let it simmer at small heat for about 30-40 minutes. Add some waters if necessary (the lentils will soak up quite an amount of water).
Cut the beetroot into 1,5 cm sticks. Combine them in a baking dish with some olive oil and the coarse sea salt. Bake them for about 20 minutes until they are done.
Take a look at the lentils every now and then, to check if they need some water. I just added about 50 ml in total. In the end it should be a more a thick sauce and not so much sauce at all!
Cut the cabanossi lengthwise in quarters Then dice it up in equal pieces.
When the lentils are done, but still a bit firm to the bite (al dente), remove it from the heat and add the cabanossi. Season with the smoked paprika, the chilli and salt and pepper.
Serve the lentils, topped with the roasted beetroot sticks.


![glutenfreie ButterkekseDecorated Sugar Cookies with the Daring Bakers [gluten-free]](https://coconutandvanilla.com/wp-content/uploads/2010/09/SDC14677_bearbeitet_klein.jpg)
![Decorated Sugar Cookies with the Daring Bakers [gluten-free]](https://coconutandvanilla.com/wp-content/images/posts/Kekse/glutenfreie_butterkekse/SDC14677_bearbeitet.jpg "Decorated Sugar Cookies with the Daring Bakers [gluten-free]")
![Decorated Sugar Cookies with the Daring Bakers [gluten-free]](https://coconutandvanilla.com/wp-content/images/posts/Kekse/glutenfreie_butterkekse/SDC14687_bearbeitet.jpg "Decorated Sugar Cookies with the Daring Bakers [gluten-free]")