We had a party at the weekend. Celebrating our new apartment and my 25th. Lots of people, lots of food. Lots of fun!
Since one guest has celiac disease and I didn’t wanted to make everything special, a lot of the food was gluten-free. Also it was a good opportunity to make donuts. We love them, but it isn’t worth the work for only two people. But for 20. So searching the internet I found a recipe, that sounded good to me. We adapted it to the flours we had. To form the donuts you have to work with a pastry bag, because the dough is not firm enough to roll it out and cut out the donuts. But it’s easy. Don’t be afraid!

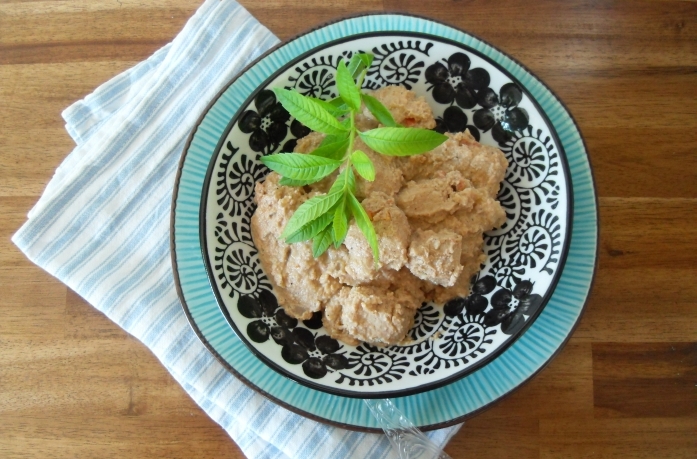
They were so good! You would never ever notice those are gluten-free! It was a real surprise.
I think it really worked out so well, because we made our own mix of flours and didn’t use a store-bought mixture, which contains mostly corn flour (in Germany). Additionally we used xanthan as a gluten substitute. Xanthan is not very common in Germany. To be truth nobody (almost) knows it. Outside Germany you can maybe imagine how baked gluten-free goods look like here. And how they taste. It’s a shame, cause with xanthan it’s so easy. I’ve baked now three times with it and every time it worked out really well. And I never baked gluten-free before that! I bought the xanthan here. It was shipped from Austria and you can purchase a larger amount, that isn’t that over expensive. Normally you need 0,5 – 1 tsp. per recipe, so if you bake often gluten-free, 500g are a good investment.

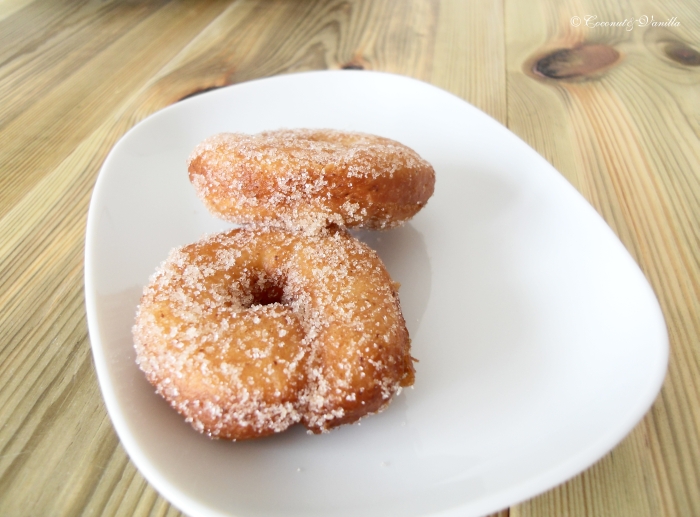
Originally we wanted to coat the donuts with sugar glaze and with chocolate, but we were tight in time, so we tossed them in cinnamon sugar. F. said, they were not that fluffy like normal donuts. The texture was more like jelly donuts. But I couldn’t think, that this is something negative. I love jelly donuts, too. So feel free to make them ball shape and fill them with jam. Everything is possible and everything will be delicious!
Gluten-free Donuts
yield: about 25 small donuts
Ingredients:
-
230 g white rice flour
-
130 g potato starch/flour
-
60 g tapioca starch/flour
-
220 g sugar
-
4 tsp xanthan
-
1 tsp salt
-
1 ¾ tsp baking powder
-
3 sachets or 7,5 tsp instant dry yeast
-
275 ml warm milk or water
-
170 g melted butter
-
2 large eggs, lightly beaten
-
oil, suitable for deep-frying
-
extra sugar and cinnamon for tossing
Combine the flours, sugar, xanthan, salt, baking powder and yeast in a bowl of your stand mixer.
Add the warm milk, melted butter and eggs. Knead for 5 minutes at medium speed.
Let the dough rest for 20 minutes.
Line parchment paper on your counter. Fill the dough in a pastry bag, fitted with a wide round tip. Pipe donuts 6 cm in diameter onto the parchment paper. Let them rest again for 20 minutes. Cut the parchment between the donuts, so every donut sits on one piece of parchment.
Prepare your oil, either in a large pot or in your deep-fryer. We preheated the oil in the deep-fryer at 170°C.
Prepare a large dish lined with paper towels for the donuts. Mix the sugar and cinnamon for the topping in a tray. Place it all next to your deep-fryer.
Gently slide 4 donuts with the parchment paper into the oil and fry until golden brown. Flip the donuts, as you remove the parchment paper using tongs. Cook until golden brown again. Remove the donuts with a slotted spoon and place them on the paper towels.
While still warm toss the donuts gently in the sugar-cinnamon mixture.

We had a party at the weekend. Celebrating our new apartment and my 25th. Lots of people, lots of food. Lots of fun!
Since one guest has celiac disease and I didn’t wanted to make everything special, a lot of the food was gluten-free. Also it was a good opportunity to make donuts. We love them, but it isn’t worth the work for only two people. But for 20. So searching the internet I found a recipe, that sounded good to me. We adapted it to the flours we had. To form the donuts you have to work with a pastry bag, because the dough is not firm enough to roll it out and cut out the donuts. But it’s easy. Don’t be afraid!
They were so good! You would never ever notice those are gluten-free! It was a real surprise.
I think it really worked out so well, because we made our own mix of flours and didn’t use a store-bought mixture, which contains mostly corn flour (in Germany). Additionally we used xanthan as a gluten substitute. Xanthan is not very common in Germany. To be truth nobody (almost) knows it. Outside Germany you can maybe imagine how baked gluten-free goods look like here. And how they taste. It’s a shame, cause with xanthan it’s so easy. I’ve baked now three times with it and every time it worked out really well. And I never baked gluten-free before that! I bought the xanthan here. It was shipped from Austria and you can purchase a larger amount, that isn’t that over expensive. Normally you need 0,5 – 1 tsp. per recipe, so if you bake often gluten-free, 500g are a good investment.
Originally we wanted to coat the donuts with sugar glaze and with chocolate, but we were tight in time, so we tossed them in cinnamon sugar. F. said, they were not that fluffy like normal donuts. The texture was more like jelly donuts. But I couldn’t think, that this is something negative. I love jelly donuts, too. So feel free to make them ball shape and fill them with jam. Everything is possible and everything will be delicious!
Gluten-free Donuts
yield: about 25 small donuts
Ingredients:
-
230g white rice flour
-
130g potato starch/flour
-
60g tapioca starch/flour
-
220g sugar
-
4 tsp xanthan
-
1 tsp salt
-
1 ¾ tsp baking powder
-
3 sachets or 7,5 tsp instant dry yeast
-
275ml warm milk or water
-
170g melted butter
-
2 large eggs, lightly beaten
-
oil, suitable for deep-frying
-
extra sugar and cinnamon for tossing
Combine the flours, xanthan, salt, baking powder and yeast in a bowl of your stand mixer.
Add the warm milk, melted butter and eggs. Knead for 5 minutes at medium speed.
Let the dough rest for 20 minutes.
Line parchment paper on your counter. Fill the dough in a pastry bag, fitted with a wide round tip. Pipe donuts 6 cm in diameter onto the parchment paper. Let them rest again for 20 minutes. Cut the parchment between the donuts, so every donut sits on one piece of parchment.
Prepare your oil, either in a large pot or in your deep-fryer. We preheated the oil in the deep-fryer at 170°C.
Prepare a large dish lined with paper towels for the donuts. Mix the sugar and cinnamon for the topping in a tray. Place it all next to your deep-fryer.
Gently slide 4 donuts with the parchment paper into the oil and fry until golden brown. Flip the donuts, as you remove the parchment paper using tongs. Cook until golden brown again. Remove the donuts with a slotted spoon and place them on the paper towels.
While still warm toss the donuts gently in the sugar-cinnamon mixture.
Enjoy!