Piece Monteé Piece Monteé

The May 2010 Daring Bakers’ challenge was hosted by Cat of Little Miss Cupcake. Cat challenged everyone to make a piece montée, or croquembouche, based on recipes from Peter Kump’s Baking School in Manhattan and Nick Malgieri.
Piece Monteé

This month’s challenge was a challenge for me, not because of the recipe, but because we moved this month to a new flat, where we renovated a lot ourselves. Additionally we bought our first own kitchen, which had to be build up. We also took charge of the water supply, which was half a disaster, but now it works properly.

So kitchen is just (mostly) completely built up since yesterday, and also the water supply for the sink, the dishwasher and the washing machine.

But I managed to cook the crème patissiere the day before yesterday and baked today the choux. So I’m a day late, but I’m very proud, that I managed it anyway.
Piece Monteé

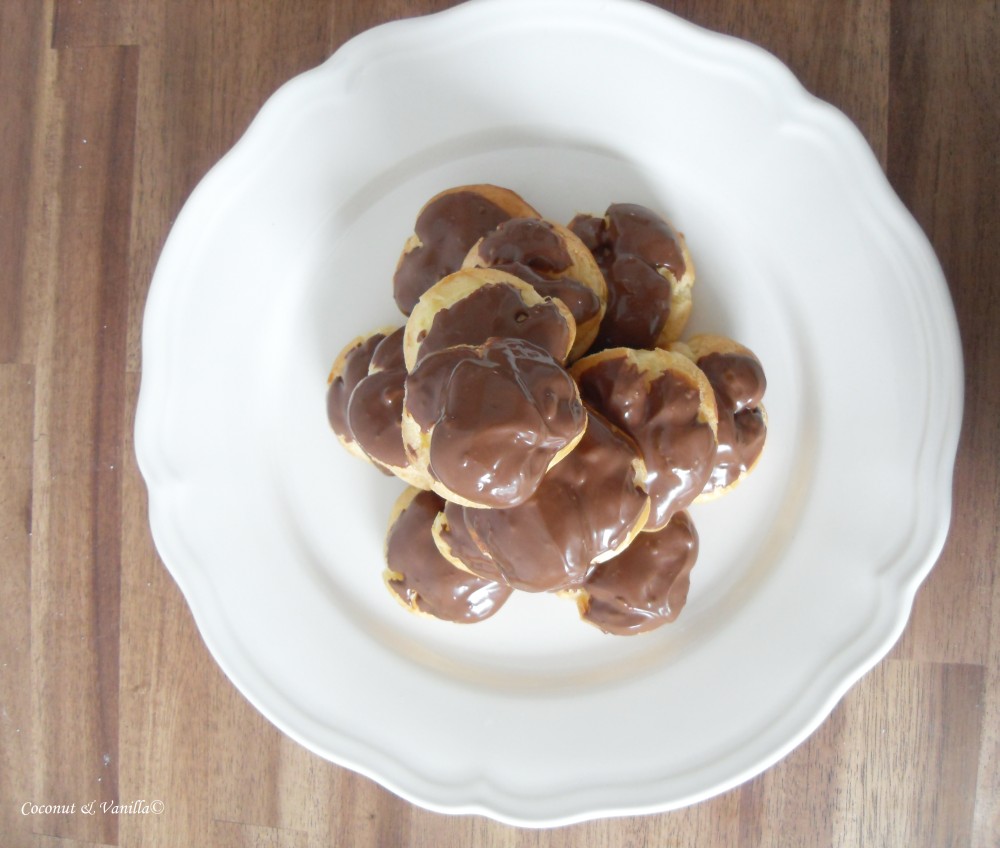
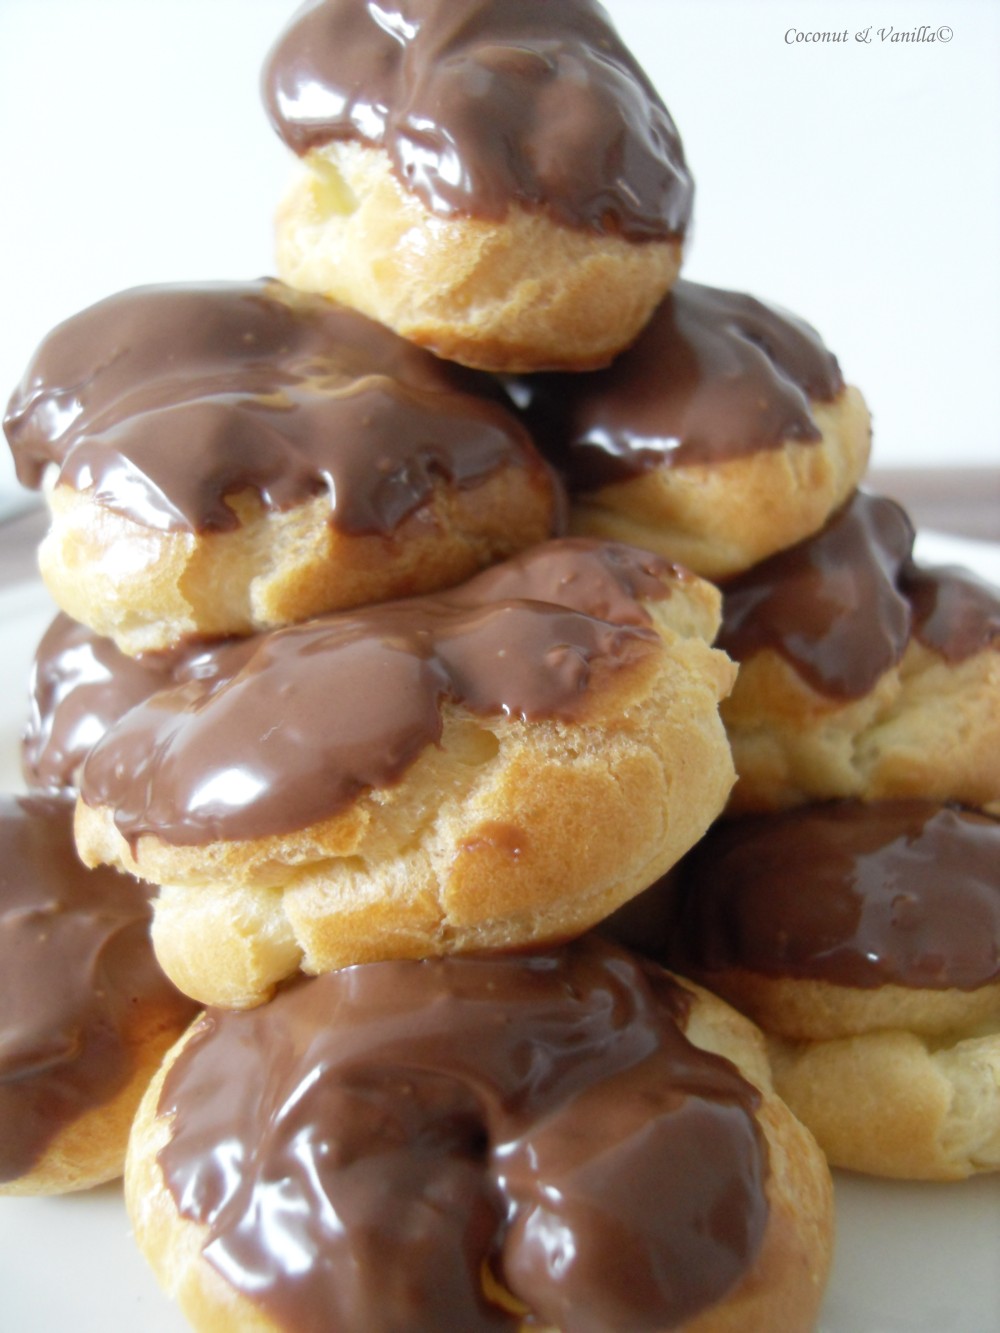
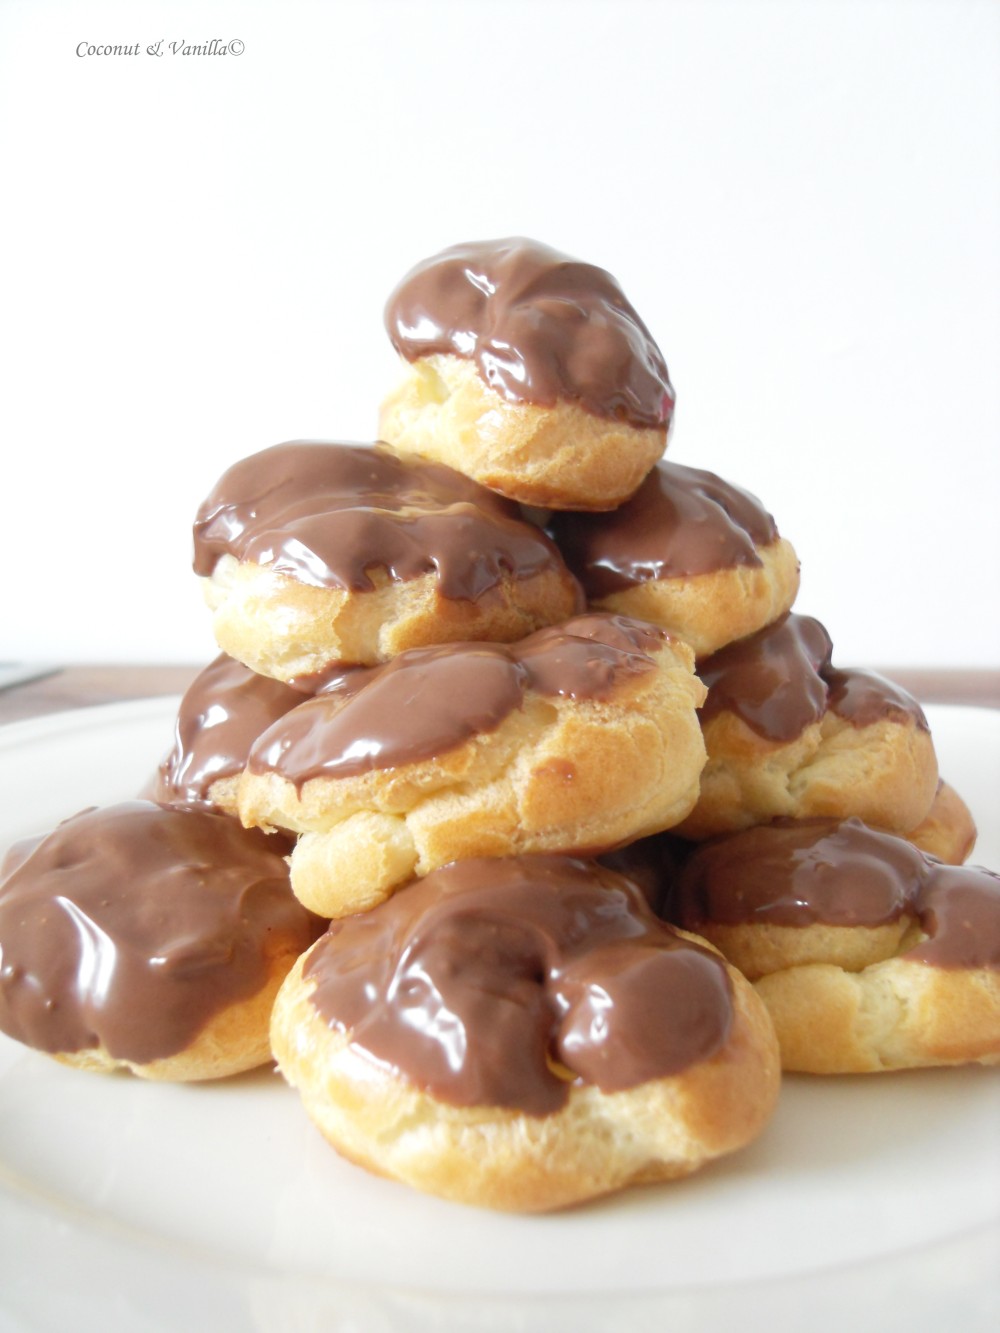
The recipe was very easy, although the choux were very flat, because the dough was too runny. The just flattened, after I piped them on the baking sheet. I didn’t taste the piece montée alltogether, because it’s our dessert after dinner later. But I tasted the choux with the chocolate glaze, which is very good, just as well as the vanilla crème patissier. So we are really looking forward to this evenings dessert!

I will definitely make this recipe again, because it’s easy and tasty. Although I won’t assemble the choux to a mount. They are good to eat just one or two in between.

I made the recipe, as it stands below. You get as much filled choux as you see in my picture (for a small mount). But I had double as much choux leftover without filling (very sad). So if you want to fill them all instantly, make the doubled batch crème patissiere. Or otherwise keep the leftover choux until you want to fill them in an airtight container and the make another batch crème patissiere to fill them right away, when you need them.
Piece Monteé

Recipe

Piece Montée

Vanilla Crème Patissiere (Half Batch)

Ingredients:

1 cup (225 ml.) whole milk
2 Tbsp. cornstarch
6 Tbsp. (100 g.) sugar
1 large egg
2 large egg yolks
2 Tbsp. (30 g.) unsalted butter
1 Tsp. Vanilla

Dissolve cornstarch in ¼ cup of milk. Combine the remaining milk with the sugar in a saucepan; bring to boil; remove from heat.

Beat the whole egg, then the yolks into the cornstarch mixture. Pour 1/3 of boiling milk into the egg mixture, whisking constantly so that the eggs do not begin to cook.

Return the remaining milk to boil. Pour in the hot egg mixture in a stream, continuing whisking.

Continue whisking (this is important – you do not want the eggs to solidify/cook) until the cream thickens and comes to a boil. Remove from heat and beat in the butter and vanilla.

Pour cream into a stainless steel/ceramic bowl. Press plastic wrap firmly against the surface. Chill immediately and until ready to use.

For Chocolate Pastry Cream (Half Batch Recipe):
Bring ¼ cup (about 50 cl.) milk to a boil in a small pan; remove from heat and add in 3 ounces (about 80 g.) semisweet chocolate, finely chopped, and mix until smooth. Whisk into pastry cream when you add the butter and vanilla.


Pate a Choux

Yield: About 28

Ingredients:


  • ¾ cup (175 ml.) water
  • 6 Tbsp. (85 g.) unsalted butter
  • ¼ Tsp. salt
  • 1 Tbsp. sugar
  • 1 cup (125 g.) all-purpose flour
  • 4 large eggs
  • for Egg Wash: 1 egg and pinch of salt

Pre-heat oven to 425◦F/220◦C degrees. Line two baking sheets with parchment paper.

Preparing batter:
Combine water, butter, salt and sugar in a saucepan over medium heat. Bring to a boil and stir occasionally. At boil, remove from heat and sift in the flour, stirring to combine completely.

Return to heat and cook, stirring constantly until the batter dries slightly and begins to pull away from the sides of the pan.

Transfer to a bowl and stir with a wooden spoon 1 minute to cool slightly.

Add 1 egg. The batter will appear loose and shiny. As you stir, the batter will become dry-looking like lightly buttered mashed potatoes.

It is at this point that you will add in the next egg. Repeat until you have incorporated all the eggs.

Piping:
Transfer batter to a pastry bag fitted with a large open tip (I piped directly from the bag opening without a tip). Pipe choux about 1 inch-part in the baking sheets. Choux should be about 1 inch high about 1 inch wide.

Using a clean finger dipped in hot water, gently press down on any tips that have formed on the top of choux when piping. You want them to retain their ball shape, but be smoothly curved on top.

Brush tops with egg wash (1 egg lightly beaten with pinch of salt).

Baking:
Bake the choux at 425◦F/220◦C degrees until well-puffed and turning lightly golden in color, about 10 minutes.

Lower the temperature to 350◦F/180◦C degrees and continue baking until well-colored and dry, about 20 minutes more. Remove to a rack and cool.

Can be stored in a airtight box overnight.

Filling:
When you are ready to assemble your piece montée, using a plain pastry tip, pierce the bottom of each choux. Fill the choux with pastry cream using either the same tip or a star tip, and place on a paper-lined sheet. Choux can be refrigerated briefly at this point while you make your glaze.

Use one of these to top your choux and assemble your piece montée.

Chocolate Glaze:

  • 8 ounces/200 g. finely chopped chocolate (use the finest quality you can afford as the taste will be quite pronounced; I recommend semi-sweet)

Melt chocolate in microwave or double boiler. Stir at regular intervals to avoid burning. Use the best quality chocolate you can afford. Use immediately.

The May 2010 Daring Bakers’ challenge was hosted by Cat of Little Miss Cupcake. Cat challenged everyone to make a piece montée, or croquembouche, based on recipes from Peter Kump’s Baking School in Manhattan and Nick Malgieri.

Piece Monteé

This month’s challenge was a challenge for me, not because of the recipe, but because we moved this month to a new flat, where we renovated a lot ourselves. Additionally we bought our first own kitchen, which had to be build up. We also took charge of the water supply, which was half a disaster, but now it works properly.

So kitchen is just (mostly) completely built up since yesterday, and also the water supply for the sink, the dishwasher and the washing machine.

But I managed to cook the crème patissiere the day before yesterday and baked today the choux. So I’m a day late, but I’m very proud, that I managed it anyway.

Piece Monteé

The recipe was very easy, although the choux were very flat, because the dough was too runny. The just flattened, after I piped them on the baking sheet. I didn’t taste the piece montée alltogether, because it’s our dessert after dinner later. But I tasted the choux with the chocolate glaze, which is very good, just as well as the vanilla crème patissier. So we are really looking forward to this evenings dessert!

I will definitely make this recipe again, because it’s easy and tasty. Although I won’t assemble the choux to a mount. They are good to eat just one or two in between.

I made the recipe, as it stands below. You get as much filled choux as you see in my picture (for a small mount). But I had double as much choux leftover without filling (very sad). So if you want to fill them all instantly, make the doubled batch crème patissiere. Or otherwise keep the leftover choux until you want to fill them in an airtight container and the make another batch crème patissiere to fill them right away, when you need them.

Piece Monteé

Recipe

Piece Montée

Vanilla Crème Patissiere (Half Batch)

Ingredients:

1 cup (225 ml.) whole milk
2 Tbsp. cornstarch
6 Tbsp. (100 g.) sugar
1 large egg
2 large egg yolks
2 Tbsp. (30 g.) unsalted butter
1 Tsp. Vanilla

Dissolve cornstarch in ¼ cup of milk. Combine the remaining milk with the sugar in a saucepan; bring to boil; remove from heat.

Beat the whole egg, then the yolks into the cornstarch mixture. Pour 1/3 of boiling milk into the egg mixture, whisking constantly so that the eggs do not begin to cook.

Return the remaining milk to boil. Pour in the hot egg mixture in a stream, continuing whisking.

Continue whisking (this is important – you do not want the eggs to solidify/cook) until the cream thickens and comes to a boil. Remove from heat and beat in the butter and vanilla.

Pour cream into a stainless steel/ceramic bowl. Press plastic wrap firmly against the surface. Chill immediately and until ready to use.

For Chocolate Pastry Cream (Half Batch Recipe):
Bring ¼ cup (about 50 cl.) milk to a boil in a small pan; remove from heat and add in 3 ounces (about 80 g.) semisweet chocolate, finely chopped, and mix until smooth. Whisk into pastry cream when you add the butter and vanilla.


Pate a Choux

Yield: About 28

Ingredients:


  • ¾ cup (175 ml.) water
  • 6 Tbsp. (85 g.) unsalted butter
  • ¼ Tsp. salt
  • 1 Tbsp. sugar
  • 1 cup (125 g.) all-purpose flour
  • 4 large eggs
  • for Egg Wash: 1 egg and pinch of salt

Pre-heat oven to 425◦F/220◦C degrees. Line two baking sheets with parchment paper.

Preparing batter:
Combine water, butter, salt and sugar in a saucepan over medium heat. Bring to a boil and stir occasionally. At boil, remove from heat and sift in the flour, stirring to combine completely.

Return to heat and cook, stirring constantly until the batter dries slightly and begins to pull away from the sides of the pan.

Transfer to a bowl and stir with a wooden spoon 1 minute to cool slightly.

Add 1 egg. The batter will appear loose and shiny. As you stir, the batter will become dry-looking like lightly buttered mashed potatoes.

It is at this point that you will add in the next egg. Repeat until you have incorporated all the eggs.

Piping:
Transfer batter to a pastry bag fitted with a large open tip (I piped directly from the bag opening without a tip). Pipe choux about 1 inch-part in the baking sheets. Choux should be about 1 inch high about 1 inch wide.

Using a clean finger dipped in hot water, gently press down on any tips that have formed on the top of choux when piping. You want them to retain their ball shape, but be smoothly curved on top.

Brush tops with egg wash (1 egg lightly beaten with pinch of salt).

Baking:
Bake the choux at 425◦F/220◦C degrees until well-puffed and turning lightly golden in color, about 10 minutes.

Lower the temperature to 350◦F/180◦C degrees and continue baking until well-colored and dry, about 20 minutes more. Remove to a rack and cool.

Can be stored in a airtight box overnight.

Filling:
When you are ready to assemble your piece montée, using a plain pastry tip, pierce the bottom of each choux. Fill the choux with pastry cream using either the same tip or a star tip, and place on a paper-lined sheet. Choux can be refrigerated briefly at this point while you make your glaze.

Use one of these to top your choux and assemble your piece montée.

Chocolate Glaze:

  • 8 ounces/200 g. finely chopped chocolate (use the finest quality you can afford as the taste will be quite pronounced; I recommend semi-sweet)

Melt chocolate in microwave or double boiler. Stir at regular intervals to avoid burning. Use the best quality chocolate you can afford. Use immediately.

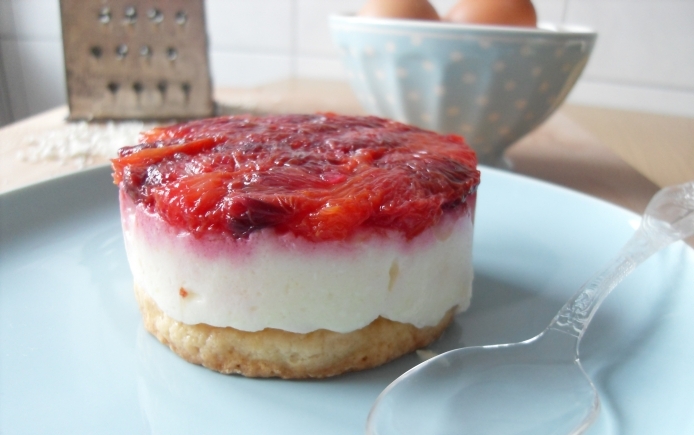
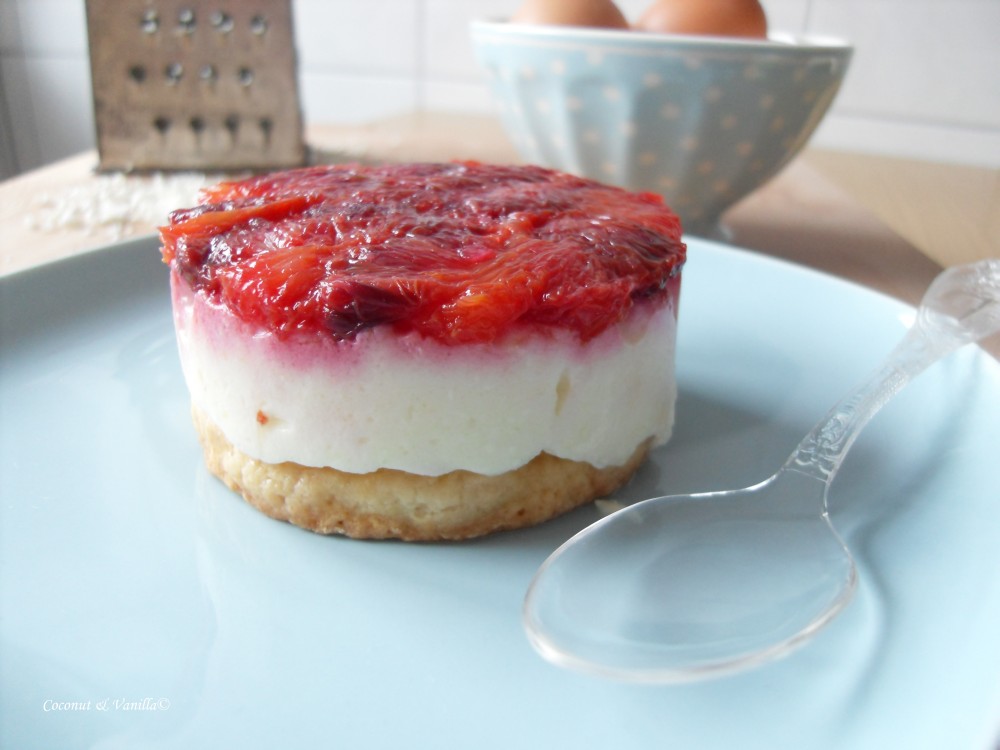
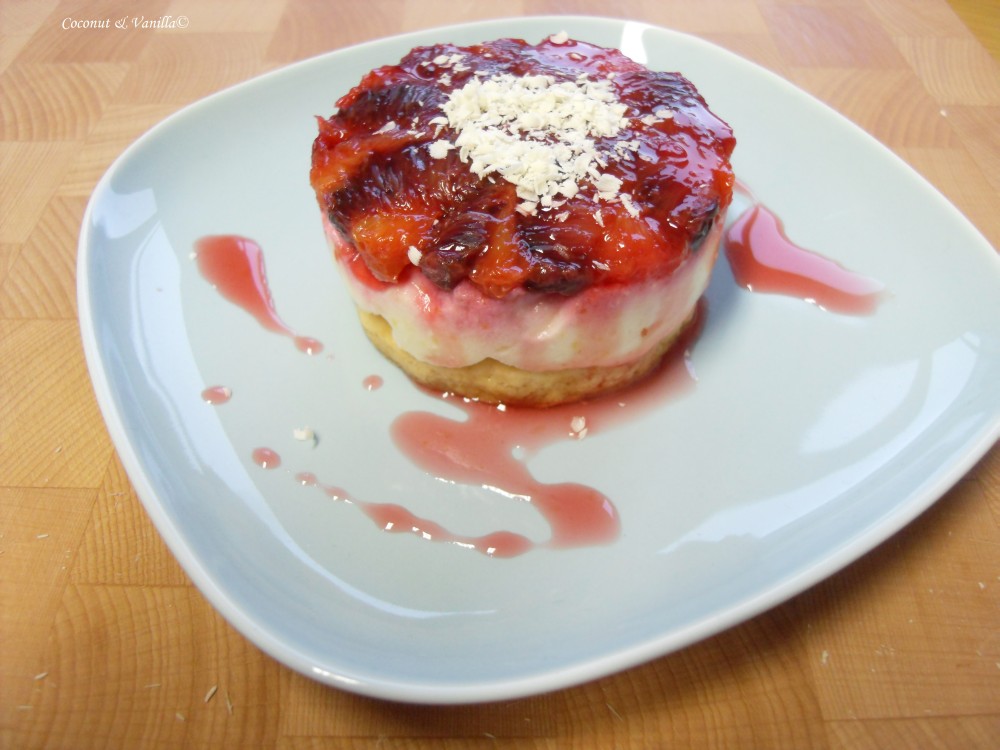
Blutorangen-Tian mit weißer SchokoladeBlood Orange and White Chocolate Tian

Blutorangen-Tian mit weißer Schokolade

I know the reveal date for the Daring Bakers challenge was 4 days ago. Since I was in Nuremberg again for family festivities, I didn’t had the time to post it. Since I’m still short in time because of learning, I hope you will forgive me, that this is not the best and longest post. But I’m feeling guilty. And since I’d done the challenge in time, I must blog it.

The 2010 March Daring Baker’s challenge was hosted by Jennifer of Chocolate Shavings. She chose Orange Tian as the challenge for this month, a dessert based on a recipe from Alain Ducasse’s Cooking School in Paris.

Blutorangen-Tian mit weißer Schokolade

As I read the challenge a month ago, I was disappointed. Whipped cream with some citrus isn’t something I would eat or order or bake. But a challenge also means to try things you normally wouldn’t. So I gave it a try. For safety reasons I only made the half amount.

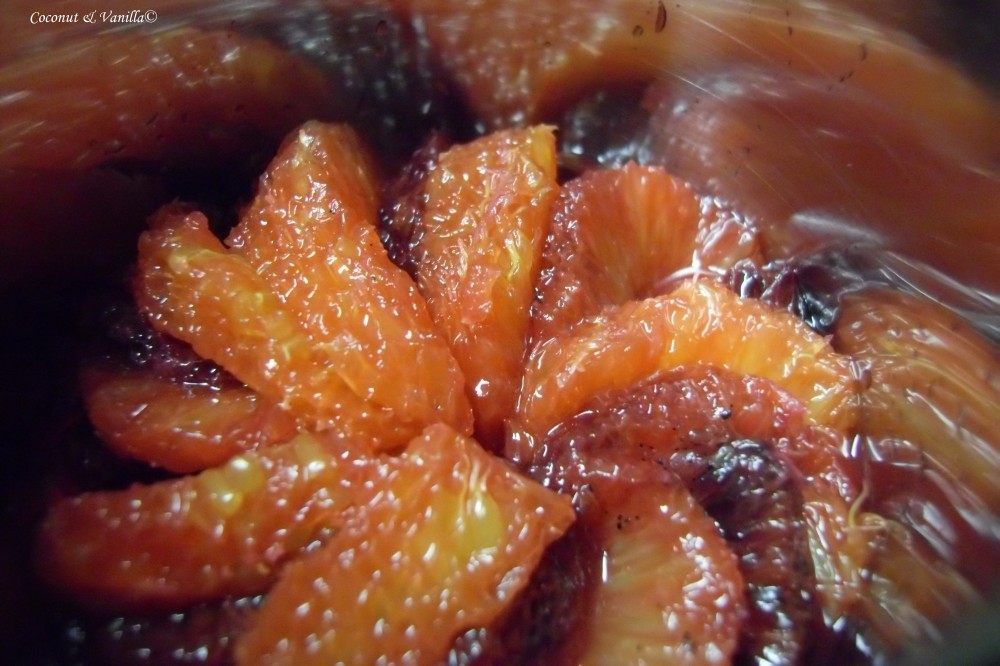
Making the (blood) orange marmalade was easy. I used Gelierzucker (jam sugar), instead of sugar and pectin. Gelierzucker is common here in Germany and always used for making jam. I wouldn’t have known where to buy pectin (and it’s already in the Gelierzucker).

The marmalade tasted very good, not a hint of bitterness. It smells intensive of oranges. Unfortunately it smells more as it tastes of oranges. Maybe because of the blanching.

Blutorangen-Tian mit weißer Schokolade

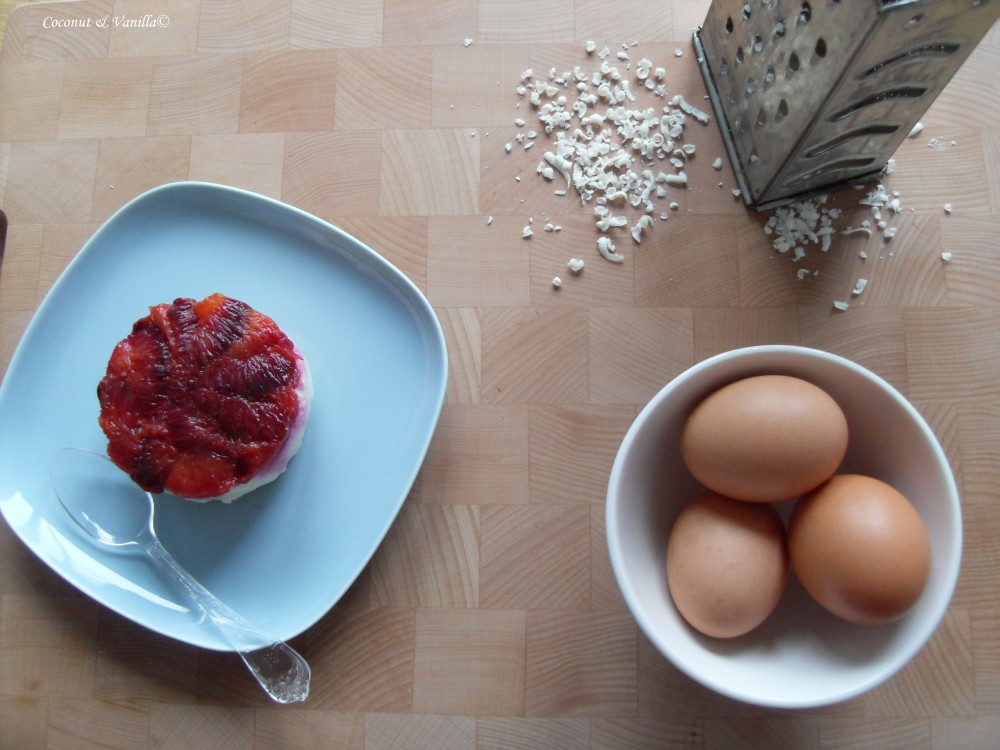
I don’t know why, but my paté shrunk in the oven and so it was a bit too small for my cookie cutters. I added some shredded white chocolate in the whipped cream (of which I used the double amount, since it was not enough), which added a nice, slightly sweet flavour. The hardening of the cream with the gelatine didn’t really work. I used leaves instead of powder, but I cannot imagine, that this was the mistake. So I added a sachet of Sahnesteif (stabilizer for whipping cream) for more stiffness and let it stay some more time in the freezer.

In the end it tasted good and it was a light dessert. You could have eaten two in a row. But we didn’t ;-).

But probably I won’t do it again. It costs a lot of time just for this small dessert, which is eaten in no time and not as satisfying, as what I would expect from a good dessert. But anyway it was fun to do and to learn something new.

Blutorangen-Tian mit weißer Schokolade

Recipe

Orange Tian

for the pate sablee

Ingredients:

  • 2 medium-sized egg yolks at room temperature
  • granulated sugar 80 grams
  • vanilla extract ½ teaspoon
  • Unsalted butter 100 grams ice cold, cubed
  • Salt 1/3 teaspoon
  • All-purpose flour 200 grams
  • baking powder 1 teaspoon

Directions: Put the flour, baking powder, ice cold cubed butter and salt in a food processor fitted with a steel blade.

In a separate bowl, add the eggs yolks, vanilla extract and sugar and beat with a whisk until the mixture is pale. Pour the egg mixture in the food processor.

Process until the dough just comes together. If you find that the dough is still a little too crumbly to come together, add a couple drops of water and process again to form a homogenous ball of dough. Form into a disc, cover with plastic wrap and leave to rest in the fridge for 30 minutes. Preheat your oven to 350 degree Fahrenheit.

Roll out the dough onto a lightly floured surface until you obtain a ¼ inch thick circle.

Using your cookie cutter, cut out circles of dough and place on a parchment (or silicone) lined baking sheet. Bake for 20 minutes or until the circles of dough are just golden.


for the marmalade

Ingredients:

  • Freshly pressed orange juice ¼ cup + 3 tablespoons; 3.5 oz; 100 grams
  • 1 large orange used to make orange slices
  • cold water to cook the orange slices
  • pectin 5 grams
  • granulated sugar: use the same weight as the weight of orange slices once they are cooked

Finely slice the orange. Place the orange slices in a medium-sized pot filled with cold water. Simmer for about 10 minutes, discard the water, re-fill with cold water and blanch the oranges for another 10 minutes.

Blanch the orange slices 3 times. This process removes the bitterness from the orange peel, so it is essential to use a new batch of cold water every time when you blanch the slices.

Once blanched 3 times, drain the slices and let them cool.

Once they are cool enough to handle, finely mince them (using a knife or a food processor).

Weigh the slices and use the same amount of granulated sugar . If you don’t have a scale, you can place the slices in a cup measurer and use the same amount of sugar.

In a pot over medium heat, add the minced orange slices, the sugar you just weighed, the orange juice and the pectin. Cook until the mixture reaches a jam consistency (10-15 minutes).

Transfer to a bowl, cover with plastic wrap and put in the fridge.


for the orange segments

For this step you will need 8 oranges.

Cut the oranges into segments over a shallow bowl and make sure to keep the juice. Add the segments to the bowl with the juice.


for the caramel

Ingredients:

  • granulated sugar 200 grams
  • orange juice 1.5 cups + 2 tablespoons; 400 grams

Place the sugar in a pan on medium heat and begin heating it.

Once the sugar starts to bubble and foam, slowly add the orange juice. As soon as the mixture starts boiling, remove from the heat and pour half of the mixture over the orange segments.

Reserve the other half of the caramel mixture in a small bowl — you will use this later to spoon over the finished dessert. When the dessert is assembled and setting in the freezer, heat the kept caramel sauce in a small saucepan over low heat until it thickens and just coats the back of a spoon (about 10 minutes). You can then spoon it over the orange tians.

[Tip: Be very careful when making the caramel — if you have never made caramel before, I would suggest making this step while you don’t have to worry about anything else. Bubbling sugar is extremely, extremely hot, so make sure you have a bowl of ice cold water in the kitchen in case anyone gets burnt!]


for the whipped cream

Ingredients:

  • heavy whipping cream 200 grams
  • 3 tablespoons of hot water
  • 1 tsp Gelatine
  • 1 tablespoon of confectioner’s sugar
  • orange marmalade 1 tablespoon

In a small bowl, add the gelatine and hot water, stirring well until the gelatine dissolves. Let the gelatine cool to room temperature while you make the whipped cream. Combine the cream in a chilled mixing bowl. Whip the cream using a hand mixer on low speed until the cream starts to thicken for about one minute. Add the confectioner sugar. Increase the speed to medium-high. Whip the cream until the beaters leave visible (but not lasting) trails in the cream, then add the cooled gelatine slowly while beating continuously. Continue whipping until the cream is light and fluffy and forms soft peaks. Transfer the whipped cream to a bowl and fold in the orange marmalade. [Tip: Use an ice cold bowl to make the whipped cream in. You can do this by putting your mixing bowl, cream and beater in the fridge for 20 minutes prior to whipping the cream.]


Assembling the Dessert:

Make sure you have some room in your freezer. Ideally, you should be able to fit a small baking sheet or tray of desserts to set in the freezer.

Line a small tray or baking sheet with parchment paper or a silicone sheet. Lay out 6 cookie cutters onto the parchment paper/silicone.

Drain the orange segments on a kitchen towel.

Have the marmalade, whipped cream and baked circles of dough ready to use.

Arrange the orange segments at the bottom of each cookie cutter. Make sure the segments all touch either and that there are no gaps. Make sure they fit snuggly and look pretty as they will end up being the top of the dessert. Arrange them as you would sliced apples when making an apple tart.

Once you have neatly arranged one layer of orange segments at the bottom of each cookie cutter, add a couple spoonfuls of whipped cream and gently spread it so that it fills the cookie cutter in an even layer. Leave about 1/4 inch at the top so there is room for dough circle.

Using a butter knife or small spoon, spread a small even layer of orange marmalade on each circle of dough.

Carefully place a circle of dough over each ring (the side of dough covered in marmalade should be the side touching the whipping cream). Gently press on the circle of dough to make sure the dessert is compact.

Place the desserts to set in the freezer to set for 10 minutes.

Using a small knife, gently go around the edges of the cookie cutter to make sure the dessert will be easy to unmold. Gently place your serving plate on top of a dessert (on top of the circle of dough) and turn the plate over. Gently remove the cookie cutter, add a spoonful of caramel sauce and serve immediately.

Blood Orange and White Chocolate Tian

I know the reveal date for the Daring Bakers challenge was 4 days ago. Since I was in Nuremberg again for family festivities, I didn’t had the time to post it. Since I’m still short in time because of learning, I hope you will forgive me, that this is not the best and longest post. But I’m feeling guilty. And since I’d done the challenge in time, I must blog it.

The 2010 March Daring Baker’s challenge was hosted by Jennifer of Chocolate Shavings. She chose Orange Tian as the challenge for this month, a dessert based on a recipe from Alain Ducasse’s Cooking School in Paris.

Blood Orange and White Chocolate Tian

As I read the challenge a month ago, I was disappointed. Whipped cream with some citrus isn’t something I would eat or order or bake. But a challenge also means to try things you normally wouldn’t. So I gave it a try. For safety reasons I only made the half amount.

Making the (blood) orange marmalade was easy. I used Gelierzucker (jam sugar), instead of sugar and pectin. Gelierzucker is common here in Germany and always used for making jam. I wouldn’t have known where to buy pectin (and it’s already in the Gelierzucker).

The marmalade tasted very good, not a hint of bitterness. It smells intensive of oranges. Unfortunately it smells more as it tastes of oranges. Maybe because of the blanching.

Blood Orange and White Chocolate Tian

I don’t know why, but my paté shrunk in the oven and so it was a bit too small for my cookie cutters. I added some shredded white chocolate in the whipped cream (of which I used the double amount, since it was not enough), which added a nice, slightly sweet flavour. The hardening of the cream with the gelatine didn’t really work. I used leaves instead of powder, but I cannot imagine, that this was the mistake. So I added a sachet of Sahnesteif (stabilizer for whipping cream) for more stiffness and let it stay some more time in the freezer.

In the end it tasted good and it was a light dessert. You could have eaten two in a row. But we didn’t ;-).

But probably I won’t do it again. It costs a lot of time just for this small dessert, which is eaten in no time and not as satisfying, as what I would expect from a good dessert. But anyway it was fun to do and to learn something new.

Blood Orange and White Chocolate Tian

Recipe

Orange Tian

for the pate sablee

Ingredients:

  • 2 medium-sized egg yolks at room temperature
  • granulated sugar 80 grams
  • vanilla extract ½ teaspoon
  • Unsalted butter 100 grams ice cold, cubed
  • Salt 1/3 teaspoon
  • All-purpose flour 200 grams
  • baking powder 1 teaspoon

Directions: Put the flour, baking powder, ice cold cubed butter and salt in a food processor fitted with a steel blade.

In a separate bowl, add the eggs yolks, vanilla extract and sugar and beat with a whisk until the mixture is pale. Pour the egg mixture in the food processor.

Process until the dough just comes together. If you find that the dough is still a little too crumbly to come together, add a couple drops of water and process again to form a homogenous ball of dough. Form into a disc, cover with plastic wrap and leave to rest in the fridge for 30 minutes. Preheat your oven to 350 degree Fahrenheit.

Roll out the dough onto a lightly floured surface until you obtain a ¼ inch thick circle.

Using your cookie cutter, cut out circles of dough and place on a parchment (or silicone) lined baking sheet. Bake for 20 minutes or until the circles of dough are just golden.

for the marmalade

Ingredients:

  • Freshly pressed orange juice ¼ cup + 3 tablespoons; 3.5 oz; 100 grams
  • 1 large orange used to make orange slices
  • cold water to cook the orange slices
  • pectin 5 grams
  • granulated sugar: use the same weight as the weight of orange slices once they are cooked

Finely slice the orange. Place the orange slices in a medium-sized pot filled with cold water. Simmer for about 10 minutes, discard the water, re-fill with cold water and blanch the oranges for another 10 minutes.

Blanch the orange slices 3 times. This process removes the bitterness from the orange peel, so it is essential to use a new batch of cold water every time when you blanch the slices.

Once blanched 3 times, drain the slices and let them cool.

Once they are cool enough to handle, finely mince them (using a knife or a food processor).

Weigh the slices and use the same amount of granulated sugar . If you don’t have a scale, you can place the slices in a cup measurer and use the same amount of sugar.

In a pot over medium heat, add the minced orange slices, the sugar you just weighed, the orange juice and the pectin. Cook until the mixture reaches a jam consistency (10-15 minutes).

Transfer to a bowl, cover with plastic wrap and put in the fridge.

for the orange segments

For this step you will need 8 oranges.

Cut the oranges into segments over a shallow bowl and make sure to keep the juice. Add the segments to the bowl with the juice.

for the caramel

Ingredients:

  • granulated sugar 200 grams
  • orange juice 1.5 cups + 2 tablespoons; 400 grams

Place the sugar in a pan on medium heat and begin heating it.

Once the sugar starts to bubble and foam, slowly add the orange juice. As soon as the mixture starts boiling, remove from the heat and pour half of the mixture over the orange segments.

Reserve the other half of the caramel mixture in a small bowl — you will use this later to spoon over the finished dessert. When the dessert is assembled and setting in the freezer, heat the kept caramel sauce in a small saucepan over low heat until it thickens and just coats the back of a spoon (about 10 minutes). You can then spoon it over the orange tians.

[Tip: Be very careful when making the caramel — if you have never made caramel before, I would suggest making this step while you don’t have to worry about anything else. Bubbling sugar is extremely, extremely hot, so make sure you have a bowl of ice cold water in the kitchen in case anyone gets burnt!]

for the whipped cream

Ingredients:

  • heavy whipping cream 200 grams
  • 3 tablespoons of hot water
  • 1 tsp Gelatine
  • 1 tablespoon of confectioner’s sugar
  • orange marmalade 1 tablespoon

In a small bowl, add the gelatine and hot water, stirring well until the gelatine dissolves. Let the gelatine cool to room temperature while you make the whipped cream. Combine the cream in a chilled mixing bowl. Whip the cream using a hand mixer on low speed until the cream starts to thicken for about one minute. Add the confectioner sugar. Increase the speed to medium-high. Whip the cream until the beaters leave visible (but not lasting) trails in the cream, then add the cooled gelatine slowly while beating continuously. Continue whipping until the cream is light and fluffy and forms soft peaks. Transfer the whipped cream to a bowl and fold in the orange marmalade. [Tip: Use an ice cold bowl to make the whipped cream in. You can do this by putting your mixing bowl, cream and beater in the fridge for 20 minutes prior to whipping the cream.]

Assembling the Dessert:

Make sure you have some room in your freezer. Ideally, you should be able to fit a small baking sheet or tray of desserts to set in the freezer.

Line a small tray or baking sheet with parchment paper or a silicone sheet. Lay out 6 cookie cutters onto the parchment paper/silicone.

Drain the orange segments on a kitchen towel.

Have the marmalade, whipped cream and baked circles of dough ready to use.

Arrange the orange segments at the bottom of each cookie cutter. Make sure the segments all touch either and that there are no gaps. Make sure they fit snuggly and look pretty as they will end up being the top of the dessert. Arrange them as you would sliced apples when making an apple tart.

Once you have neatly arranged one layer of orange segments at the bottom of each cookie cutter, add a couple spoonfuls of whipped cream and gently spread it so that it fills the cookie cutter in an even layer. Leave about 1/4 inch at the top so there is room for dough circle.

Using a butter knife or small spoon, spread a small even layer of orange marmalade on each circle of dough.

Carefully place a circle of dough over each ring (the side of dough covered in marmalade should be the side touching the whipping cream). Gently press on the circle of dough to make sure the dessert is compact.

Place the desserts to set in the freezer to set for 10 minutes.

Using a small knife, gently go around the edges of the cookie cutter to make sure the dessert will be easy to unmold. Gently place your serving plate on top of a dessert (on top of the circle of dough) and turn the plate over. Gently remove the cookie cutter, add a spoonful of caramel sauce and serve immediately.

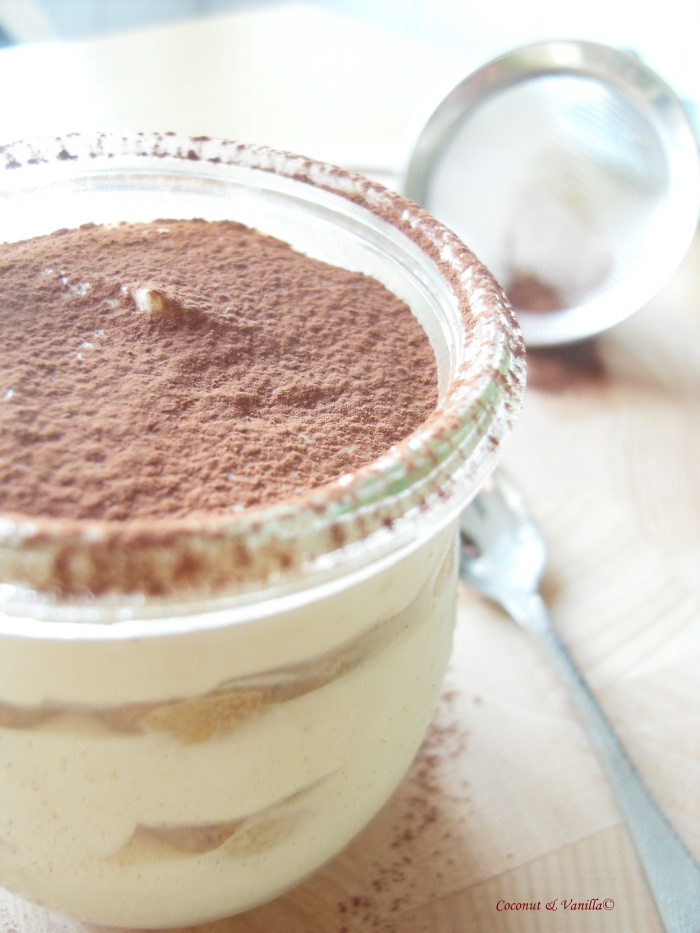
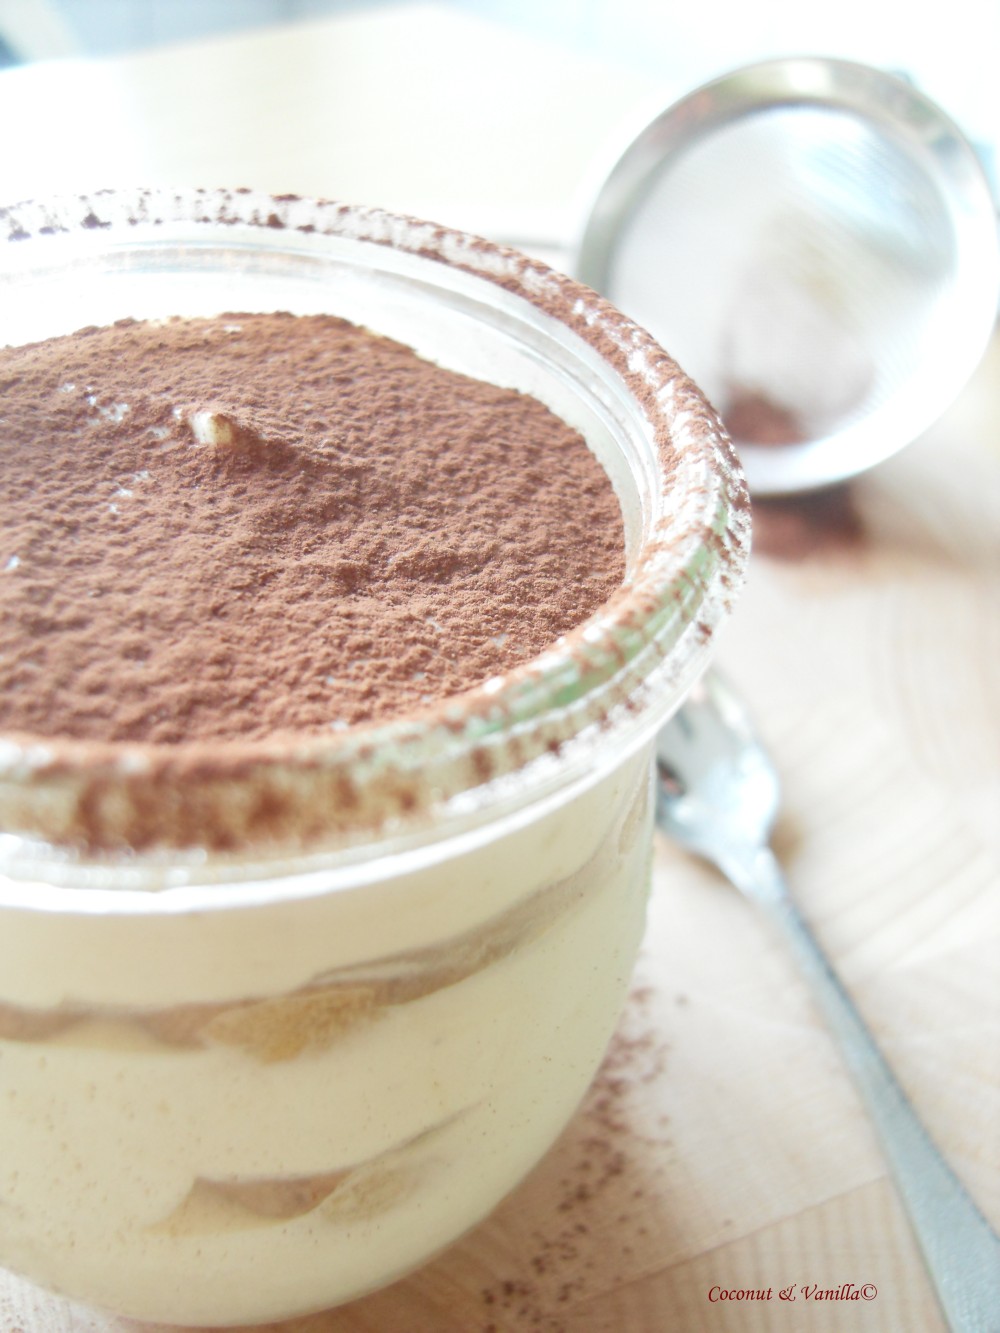
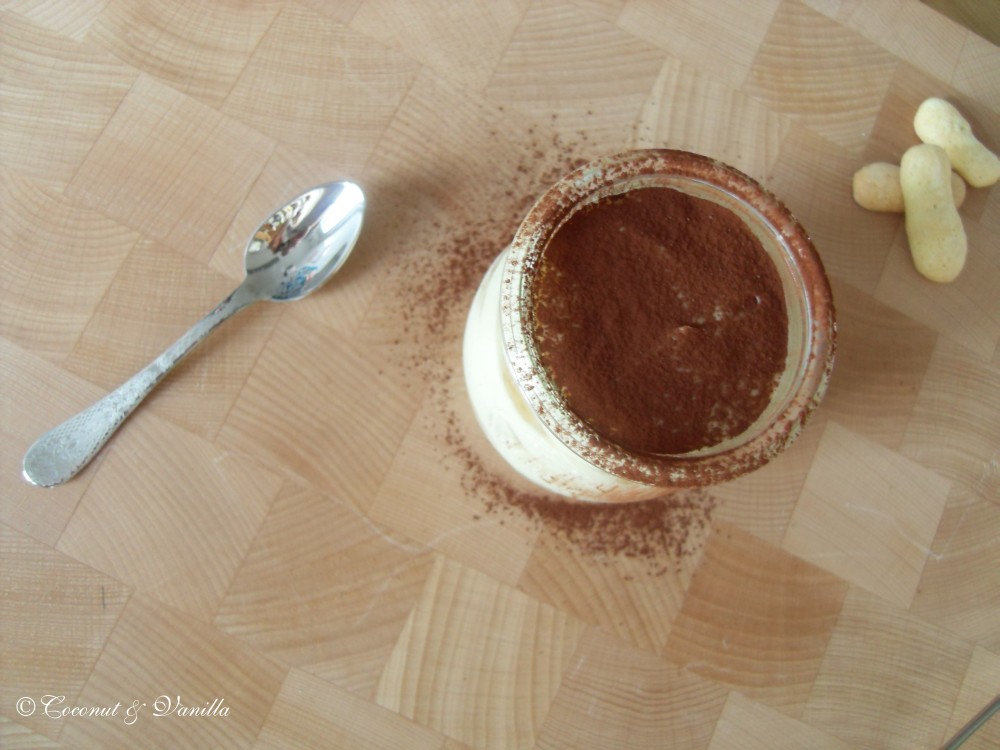
Tiramisu mit den the Daring Bakers Tiramisu with the Daring Bakers

tiramisu

Finally I get myself to write about the Daring Baker’s challenge in February. I got a bit under time pressure in the end and so I wasn’t able to post my Tiramisu yesterday on the reveal date.

The February 2010 Daring Bakers’ challenge was hosted by Aparna of My Diverse Kitchen and Deeba of Passionate About Baking. They chose Tiramisu as the challenge for the month. Their challenge recipe is based on recipes from The Washington Post, Cordon Bleu at Home and Baking Obsession.

tiramisu

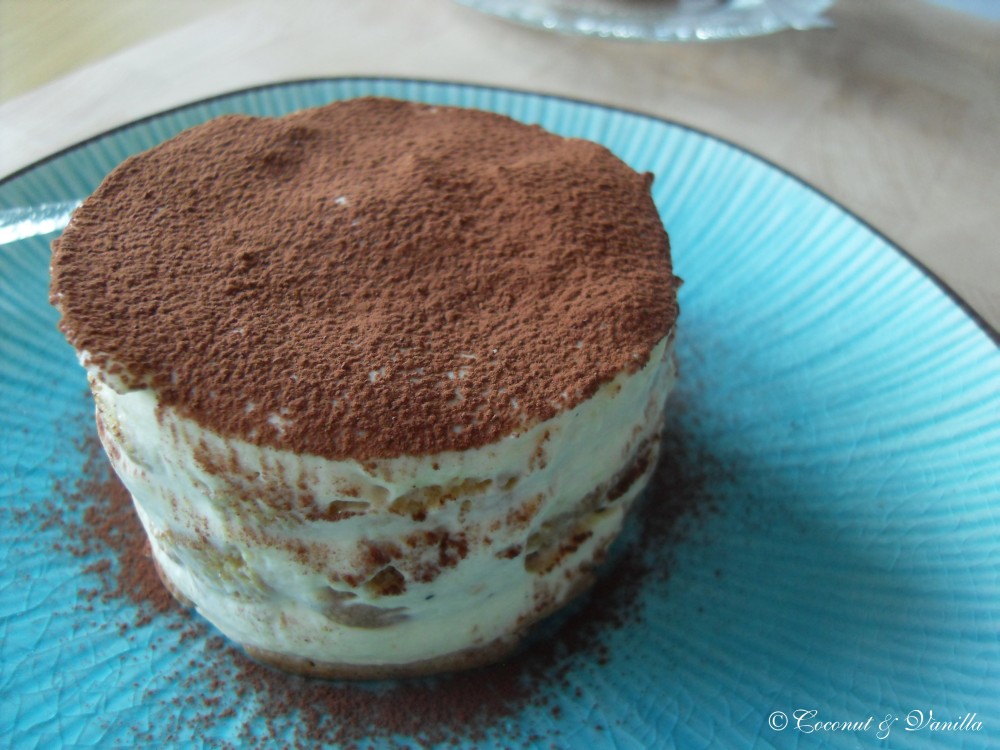
It wasn’t just the challenge to make Tiramisu. Since I had made this several times it wouldn’t be one. But we had to make our own Ladyfingers (Löffelbiskuits) and our own Mascarpone cheese for the Tiramisu. It was likely easy to make the Ladyfingers and the Mascarpone. What really took time was to make the creams. Yes creams! Two creams and whipped cream additionally. Then assembly those. I only know Tiramisu with a lot of mascarpone and little else. I think most people – or at least germans – will agree to that. The challenge recipe is totally different to that. You only use a little amount of mascarpone and more whipped cream and other ingredients. The good thing is, it is a lot lighter than the fat only-mascarpone-version. You can eat more tiramisu. Really good, hah?!

tiramisu

The bad thing is it takes a lot of time to make it. And for truth – really – it doesn’t taste much different. As I would say identical. But if you love tiramisu, I would go for the lighter eat-more-takes-more-time-version.

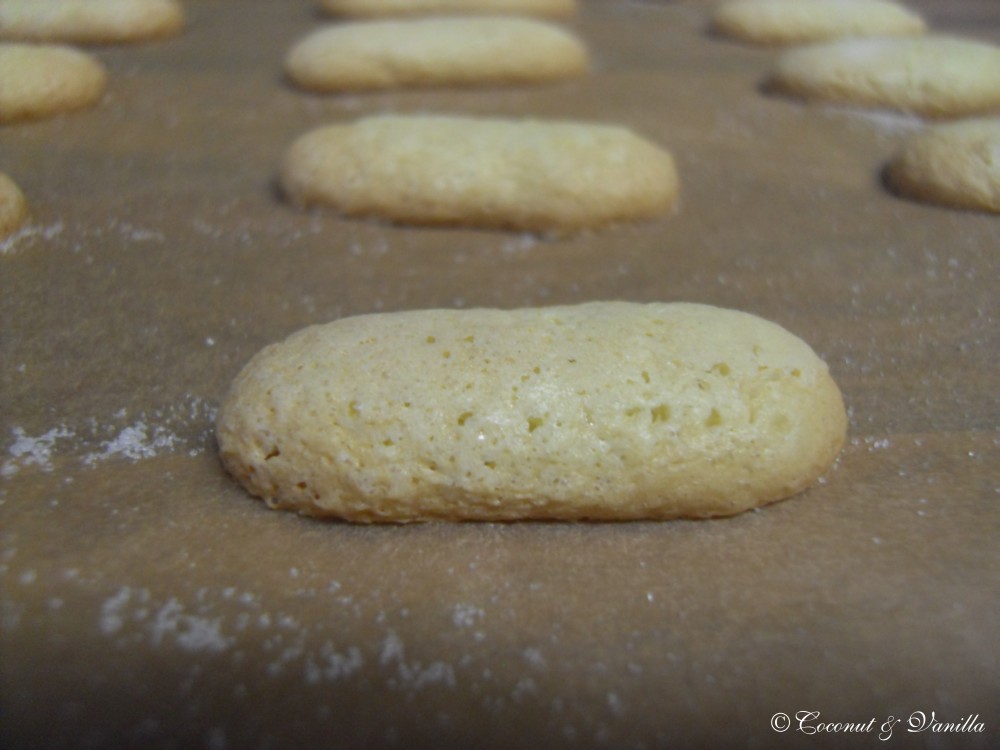
The ladyfingers turned out great. But I baked them several times before, just for my own indulgence. My mascarpone turned out, just like mascarpone you can buy. I left mine two days in the fridge, since after one day it wasn’t firm enough. My cheesecloth was thicker, than it should have been, but it worked just fine, too. But for taste, I really think it tastes the same if you use bought ladyfingers and bought mascarpone. The difference just makes the cream. But better you work it out and form your own opinion about that.

In the end definitely a delicious dessert!

tiramisu

Recipes

Mascarpone cheese

This recipe makes 12oz/ 340gm of mascarpone cheese

Ingredients:

  • 500ml whipping cream
  • 1 tablespoon fresh lemon juice

Bring 2 cm of water to a boil in a wide skillet. Reduce the heat to medium-low so the water is barely simmering. Pour the cream into a medium heat-resistant bowl, then place the bowl into the skillet. Heat the cream, stirring often, to 88°C. If you do not have a thermometer, wait until small bubbles keep trying to push up to the surface.

It will take about 15 minutes of delicate heating. Add the lemon juice and continue heating the mixture, stirring gently, until the cream curdles. Do not expect the same action as you see during ricotta cheese making. All that the whipping cream will do is become thicker, like a well-done crème anglaise. It will cover a back of your wooden spoon thickly. You will see just a few clear whey streaks when you stir. Remove the bowl from the water and let cool for about 20 minutes. Meanwhile, line a sieve with four layers of dampened cheesecloth and set it over a bowl. Transfer the mixture into the lined sieve. Do not squeeze the cheese in the cheesecloth or press on its surface (be patient, it will firm up after refrigeration time). Once cooled completely, cover with plastic wrap and refrigerate (in the sieve) overnight or up to 24 hours.

Vera’s notes: The first time I made mascarpone I had all doubts if it’d been cooked enough, because of its custard-like texture. Have no fear, it will firm up beautifully in the fridge, and will yet remain lusciously creamy.

Keep refrigerated and use within 3 to 4 days.


Ladyfingers

Ingredients:

  • 3 eggs, separated
  • 75gms granulated sugar
  • 95gms cake flour, sifted (or 3/4 cup all purpose flour + 2 tbsp corn starch)
  • 50gms confectioner’s sugar

Preheat your oven to 175 °C degrees, then lightly brush 2 baking sheets with oil or softened butter and line with parchment paper.

Beat the egg whites using a hand held electric mixer until stiff peaks form. Gradually add granulate sugar and continue beating until the egg whites become stiff again, glossy and smooth.

In a small bowl, beat the egg yolks lightly with a fork and fold them into the meringue, using a wooden spoon. Sift the flour over this mixture and fold gently until just mixed. It is important to fold very gently and not overdo the folding. Otherwise the batter would deflate and lose volume resulting in ladyfingers which are flat and not spongy.

Fit a pastry bag with a plain tip (or just snip the end off; you could also use a Ziploc bag) and fill with the batter. Pipe the batter into 5″ long and 3/4″ wide strips leaving about 1″ space in between the strips.

Sprinkle half the confectioner’s sugar over the ladyfingers and wait for 5 minutes. The sugar will pearl or look wet and glisten. Now sprinkle the remaining sugar. This helps to give the ladyfingers their characteristic crispness.

Hold the parchment paper in place with your thumb and lift one side of the baking sheet and gently tap it on the work surface to remove excess sprinkled sugar.

Bake the ladyfingers for 10 minutes, then rotate the sheets and bake for another 5 minutes or so until the puff up, turn lightly golden brown and are still soft.

Allow them to cool slightly on the sheets for about 5 minutes and then remove the ladyfingers from the baking sheet with a metal spatula while still hot, and cool on a rack.

Store them in an airtight container till required. They should keep for 2 to 3 weeks.

tiramisu

Tiramisu

Ingredients:

zabaglione

  • 2 large egg yolks
  • 50gms sugar
  • 60ml Marsala wine (or port or coffee)
  • 1/4 teaspoon vanilla extract
  • 1/2 teaspoon finely grated lemon zest

vanilla pastry cream

  • 55gms sugar1 tablespoon all purpose flour
  • 1/2 teaspoon finely grated lemon zest
  • 1/2 teaspoon vanilla extract
  • 1 large egg yolk
  • 175ml whole milk

whipped cream

  • 235ml chilled heavy cream
  • 55gms sugar
  • 1/2 teaspoon vanilla extract

for assembling

  • 470ml brewed espresso, warmed (you may use less)
  • 5ml rum
  • 110gms sugar
  • 75gms mascarpone cheese
  • 36 ladyfinger biscuits (you may use less)
  • 2 tablespoons unsweetened cocoa powder

For the zabaglione:

Heat water in a double boiler. If you don’t have a double boiler, place a pot with about an inch of water in it on the stove. Place a heat-proof bowl in the pot making sure the bottom does not touch the water.

In a large mixing bowl (or stainless steel mixing bowl), mix together the egg yolks, sugar, the Marsala (or espresso/ coffee), vanilla extract and lemon zest. Whisk together until the yolks are fully blended and the mixture looks smooth.

Transfer the mixture to the top of a double boiler or place your bowl over the pan/ pot with simmering water. Cook the egg mixture over low heat, stirring constantly, for about 8 minutes or until it resembles thick custard. It may bubble a bit as it reaches that consistency.

Let cool to room temperature and transfer the zabaglione to a bowl. Cover and refrigerate at least 4 hours or overnight, until thoroughly chilled.

For the pastry cream:

Mix together the sugar, flour, lemon zest and vanilla extract in a medium heavy-bottomed saucepan. To this add the egg yolk and half the milk. Whisk until smooth.

Now place the saucepan over low heat and cook, stirring constantly to prevent the mixture from curdling.

Add the remaining milk a little at a time, still stirring constantly. After about 12 minutes the mixture will be thick, free of lumps and beginning to bubble. (If you have a few lumps, don’t worry. You can push the cream through a fine-mesh strainer.)

Transfer the pastry cream to a bowl and cool to room temperature. Cover with plastic film and refrigerate at least 4 hours or overnight, until thoroughly chilled. For the whipped cream:

Combine the cream, sugar and vanilla extract in a mixing bowl. Beat with an electric hand mixer or immersion blender until the mixture holds stiff peaks. Set aside.

To assemble the tiramisu:

Have ready a rectangular serving dish (about 8″ by 8″ should do) or one of your choice.

Mix together the warm espresso, rum extract and sugar in a shallow dish, whisking to mix well. Set aside to cool.

In a large bowl, beat the mascarpone cheese with a spoon to break down the lumps and make it smooth. This will make it easier to fold. Add the prepared and chilled zabaglione and pastry cream, blending until just combined. Gently fold in the whipped cream. Set this cream mixture aside. Now to start assembling the tiramisu.

Workings quickly, dip 12 of the ladyfingers in the sweetened espresso, about 1 second per side. They should be moist but not soggy. Immediately transfer each ladyfinger to the platter, placing them side by side in a single row. You may break a lady finger into two, if necessary, to ensure the base of your dish is completely covered.

Spoon one-third of the cream mixture on top of the ladyfingers, then use a rubber spatula or spreading knife to cover the top evenly, all the way to the edges.

Repeat to create 2 more layers, using 12 ladyfingers and the cream mixture for each layer. Clean any spilled cream mixture; cover carefully with plastic wrap and refrigerate the tiramisu overnight.

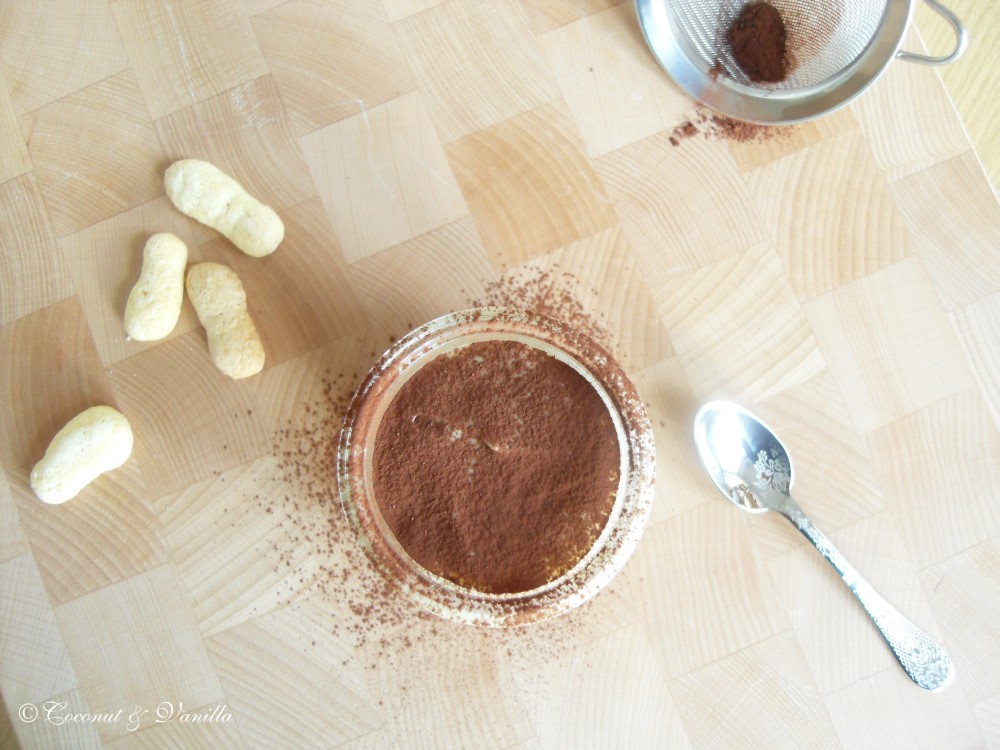
To serve, carefully remove the plastic wrap and sprinkle the tiramisu with cocoa powder using a fine-mesh strainer or decorate as you please. Cut into individual portions and serve.

tiramisu

Finally I get myself to write about the Daring Baker’s challenge in February. I got a bit under time pressure in the end and so I wasn’t able to post my Tiramisu yesterday on the reveal date.

The February 2010 Daring Bakers’ challenge was hosted by Aparna of My Diverse Kitchen and Deeba of Passionate About Baking. They chose Tiramisu as the challenge for the month. Their challenge recipe is based on recipes from The Washington Post, Cordon Bleu at Home and Baking Obsession.

tiramisu

It wasn’t just the challenge to make Tiramisu. Since I had made this several times it wouldn’t be one. But we had to make our own Ladyfingers (Löffelbiskuits) and our own Mascarpone cheese for the Tiramisu. It was likely easy to make the Ladyfingers and the Mascarpone. What really took time was to make the creams. Yes creams! Two creams and whipped cream additionally. Then assembly those. I only know Tiramisu with a lot of mascarpone and little else. I think most people – or at least germans – will agree to that. The challenge recipe is totally different to that. You only use a little amount of mascarpone and more whipped cream and other ingredients. The good thing is, it is a lot lighter than the fat only-mascarpone-version. You can eat more tiramisu. Really good, hah?!

tiramisu

 The bad thing is it takes a lot of time to make it. And for truth – really – it doesn’t taste much different. As I would say identical. But if you love tiramisu, I would go for the lighter eat-more-takes-more-time-version.

The ladyfingers turned out great. But I baked them several times before, just for my own indulgence. My mascarpone turned out, just like mascarpone you can buy. I left mine two days in the fridge, since after one day it wasn’t firm enough. My cheesecloth was thicker, than it should have been, but it worked just fine, too. But for taste, I really think it tastes the same if you use bought ladyfingers and bought mascarpone. The difference just makes the cream. But better you work it out and form your own opinion about that.

In the end definitely a delicious dessert!

tiramisu

Recipes

Mascarpone cheese

This recipe makes 12oz/ 340gm of mascarpone cheese

Ingredients:

  • 500ml whipping cream
  • 1 tablespoon fresh lemon juice

Bring 2 cm of water to a boil in a wide skillet. Reduce the heat to medium-low so the water is barely simmering. Pour the cream into a medium heat-resistant bowl, then place the bowl into the skillet. Heat the cream, stirring often, to 88°C. If you do not have a thermometer, wait until small bubbles keep trying to push up to the surface.

It will take about 15 minutes of delicate heating. Add the lemon juice and continue heating the mixture, stirring gently, until the cream curdles. Do not expect the same action as you see during ricotta cheese making. All that the whipping cream will do is become thicker, like a well-done crème anglaise. It will cover a back of your wooden spoon thickly. You will see just a few clear whey streaks when you stir. Remove the bowl from the water and let cool for about 20 minutes. Meanwhile, line a sieve with four layers of dampened cheesecloth and set it over a bowl. Transfer the mixture into the lined sieve. Do not squeeze the cheese in the cheesecloth or press on its surface (be patient, it will firm up after refrigeration time). Once cooled completely, cover with plastic wrap and refrigerate (in the sieve) overnight or up to 24 hours.

Vera’s notes: The first time I made mascarpone I had all doubts if it’d been cooked enough, because of its custard-like texture. Have no fear, it will firm up beautifully in the fridge, and will yet remain lusciously creamy.

Keep refrigerated and use within 3 to 4 days.


Ladyfingers

Ingredients:

  • 3 eggs, separated
  • 75gms granulated sugar
  • 95gms cake flour, sifted (or 3/4 cup all purpose flour + 2 tbsp corn starch)
  • 50gms confectioner’s sugar

Preheat your oven to 175 °C degrees, then lightly brush 2 baking sheets with oil or softened butter and line with parchment paper.

Beat the egg whites using a hand held electric mixer until stiff peaks form. Gradually add granulate sugar and continue beating until the egg whites become stiff again, glossy and smooth.

In a small bowl, beat the egg yolks lightly with a fork and fold them into the meringue, using a wooden spoon. Sift the flour over this mixture and fold gently until just mixed. It is important to fold very gently and not overdo the folding. Otherwise the batter would deflate and lose volume resulting in ladyfingers which are flat and not spongy.

Fit a pastry bag with a plain tip (or just snip the end off; you could also use a Ziploc bag) and fill with the batter. Pipe the batter into 5″ long and 3/4″ wide strips leaving about 1″ space in between the strips.

Sprinkle half the confectioner’s sugar over the ladyfingers and wait for 5 minutes. The sugar will pearl or look wet and glisten. Now sprinkle the remaining sugar. This helps to give the ladyfingers their characteristic crispness.

Hold the parchment paper in place with your thumb and lift one side of the baking sheet and gently tap it on the work surface to remove excess sprinkled sugar.

Bake the ladyfingers for 10 minutes, then rotate the sheets and bake for another 5 minutes or so until the puff up, turn lightly golden brown and are still soft.

Allow them to cool slightly on the sheets for about 5 minutes and then remove the ladyfingers from the baking sheet with a metal spatula while still hot, and cool on a rack.

Store them in an airtight container till required. They should keep for 2 to 3 weeks.

tiramisu

Tiramisu

Ingredients:

zabaglione

  • 2 large egg yolks
  • 50gms sugar
  • 60ml Marsala wine (or port or coffee)
  • 1/4 teaspoon vanilla extract
  • 1/2 teaspoon finely grated lemon zest

vanilla pastry cream

  • 55gms sugar1 tablespoon all purpose flour
  • 1/2 teaspoon finely grated lemon zest
  • 1/2 teaspoon vanilla extract
  • 1 large egg yolk
  • 175ml whole milk

whipped cream

  • 235ml chilled heavy cream
  • 55gms sugar
  • 1/2 teaspoon vanilla extract

for assembling

  • 470ml brewed espresso, warmed (you may use less)
  • 5ml rum
  • 110gms sugar
  • 75gms mascarpone cheese
  • 36 ladyfinger biscuits (you may use less)
  • 2 tablespoons unsweetened cocoa powder

For the zabaglione:

Heat water in a double boiler. If you don’t have a double boiler, place a pot with about an inch of water in it on the stove. Place a heat-proof bowl in the pot making sure the bottom does not touch the water.

In a large mixing bowl (or stainless steel mixing bowl), mix together the egg yolks, sugar, the Marsala (or espresso/ coffee), vanilla extract and lemon zest. Whisk together until the yolks are fully blended and the mixture looks smooth.

Transfer the mixture to the top of a double boiler or place your bowl over the pan/ pot with simmering water. Cook the egg mixture over low heat, stirring constantly, for about 8 minutes or until it resembles thick custard. It may bubble a bit as it reaches that consistency.

Let cool to room temperature and transfer the zabaglione to a bowl. Cover and refrigerate at least 4 hours or overnight, until thoroughly chilled.

For the pastry cream:

Mix together the sugar, flour, lemon zest and vanilla extract in a medium heavy-bottomed saucepan. To this add the egg yolk and half the milk. Whisk until smooth.

Now place the saucepan over low heat and cook, stirring constantly to prevent the mixture from curdling.

Add the remaining milk a little at a time, still stirring constantly. After about 12 minutes the mixture will be thick, free of lumps and beginning to bubble. (If you have a few lumps, don’t worry. You can push the cream through a fine-mesh strainer.)

Transfer the pastry cream to a bowl and cool to room temperature. Cover with plastic film and refrigerate at least 4 hours or overnight, until thoroughly chilled. For the whipped cream:

Combine the cream, sugar and vanilla extract in a mixing bowl. Beat with an electric hand mixer or immersion blender until the mixture holds stiff peaks. Set aside.

To assemble the tiramisu:

Have ready a rectangular serving dish (about 8″ by 8″ should do) or one of your choice.

Mix together the warm espresso, rum extract and sugar in a shallow dish, whisking to mix well. Set aside to cool.

In a large bowl, beat the mascarpone cheese with a spoon to break down the lumps and make it smooth. This will make it easier to fold. Add the prepared and chilled zabaglione and pastry cream, blending until just combined. Gently fold in the whipped cream. Set this cream mixture aside. Now to start assembling the tiramisu.

Workings quickly, dip 12 of the ladyfingers in the sweetened espresso, about 1 second per side. They should be moist but not soggy. Immediately transfer each ladyfinger to the platter, placing them side by side in a single row. You may break a lady finger into two, if necessary, to ensure the base of your dish is completely covered.

Spoon one-third of the cream mixture on top of the ladyfingers, then use a rubber spatula or spreading knife to cover the top evenly, all the way to the edges.

Repeat to create 2 more layers, using 12 ladyfingers and the cream mixture for each layer. Clean any spilled cream mixture; cover carefully with plastic wrap and refrigerate the tiramisu overnight.

To serve, carefully remove the plastic wrap and sprinkle the tiramisu with cocoa powder using a fine-mesh strainer or decorate as you please. Cut into individual portions and serve.

LebkuchendorfGingerbread Village

Lebkuchendorf

I hope you all had wonderful holidays and you enjoyed the festivites. I did, since I didn’t had much time recently, which you probably realized, because it’s the first entry this month in my beloved blog. I swear it will be better in the new year.

So this entry is all about the December’s Daring Bakers challenge.


Lebkuchendorf

The December 2009 Daring Bakers’ challenge was brought to you by Anna of Very Small Anna and Y of Lemonpi. They chose to challenge Daring Bakers’ everywhere to bake and assemble a gingerbread house from scratch. They chose recipes from Good Housekeeping and from The Great Scandinavian Baking Book as the challenge recipes.

Lebkuchendorf

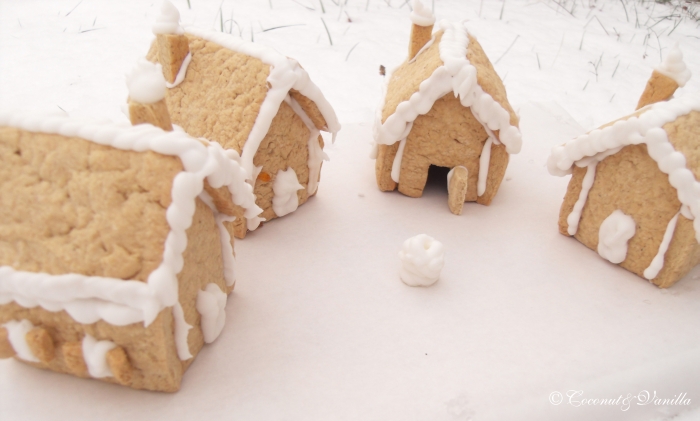
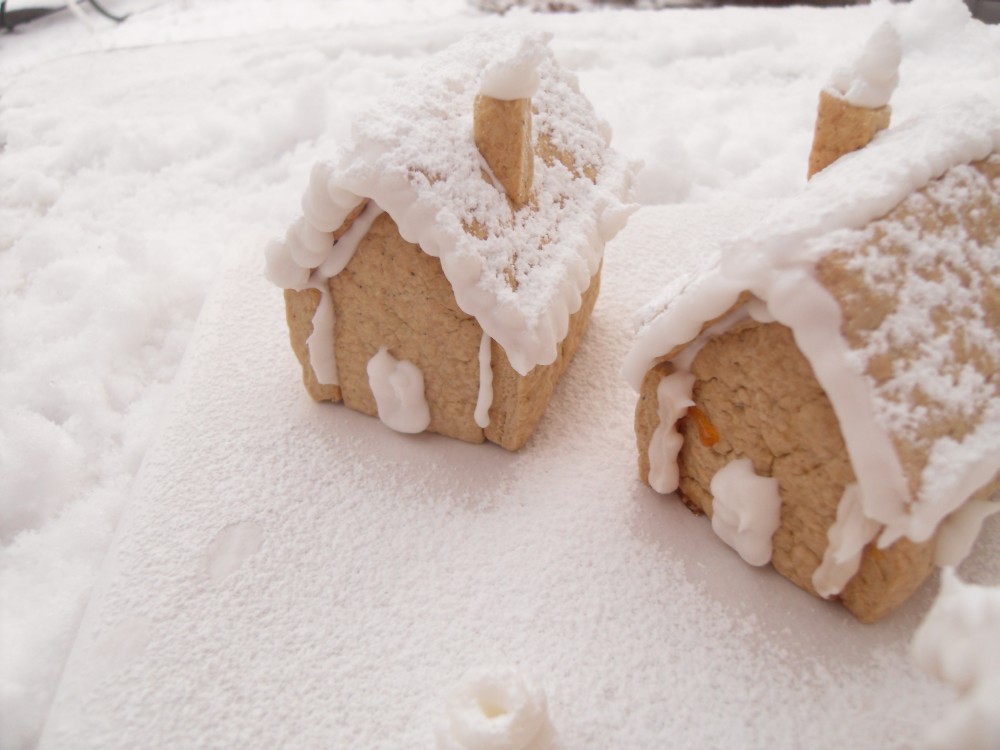
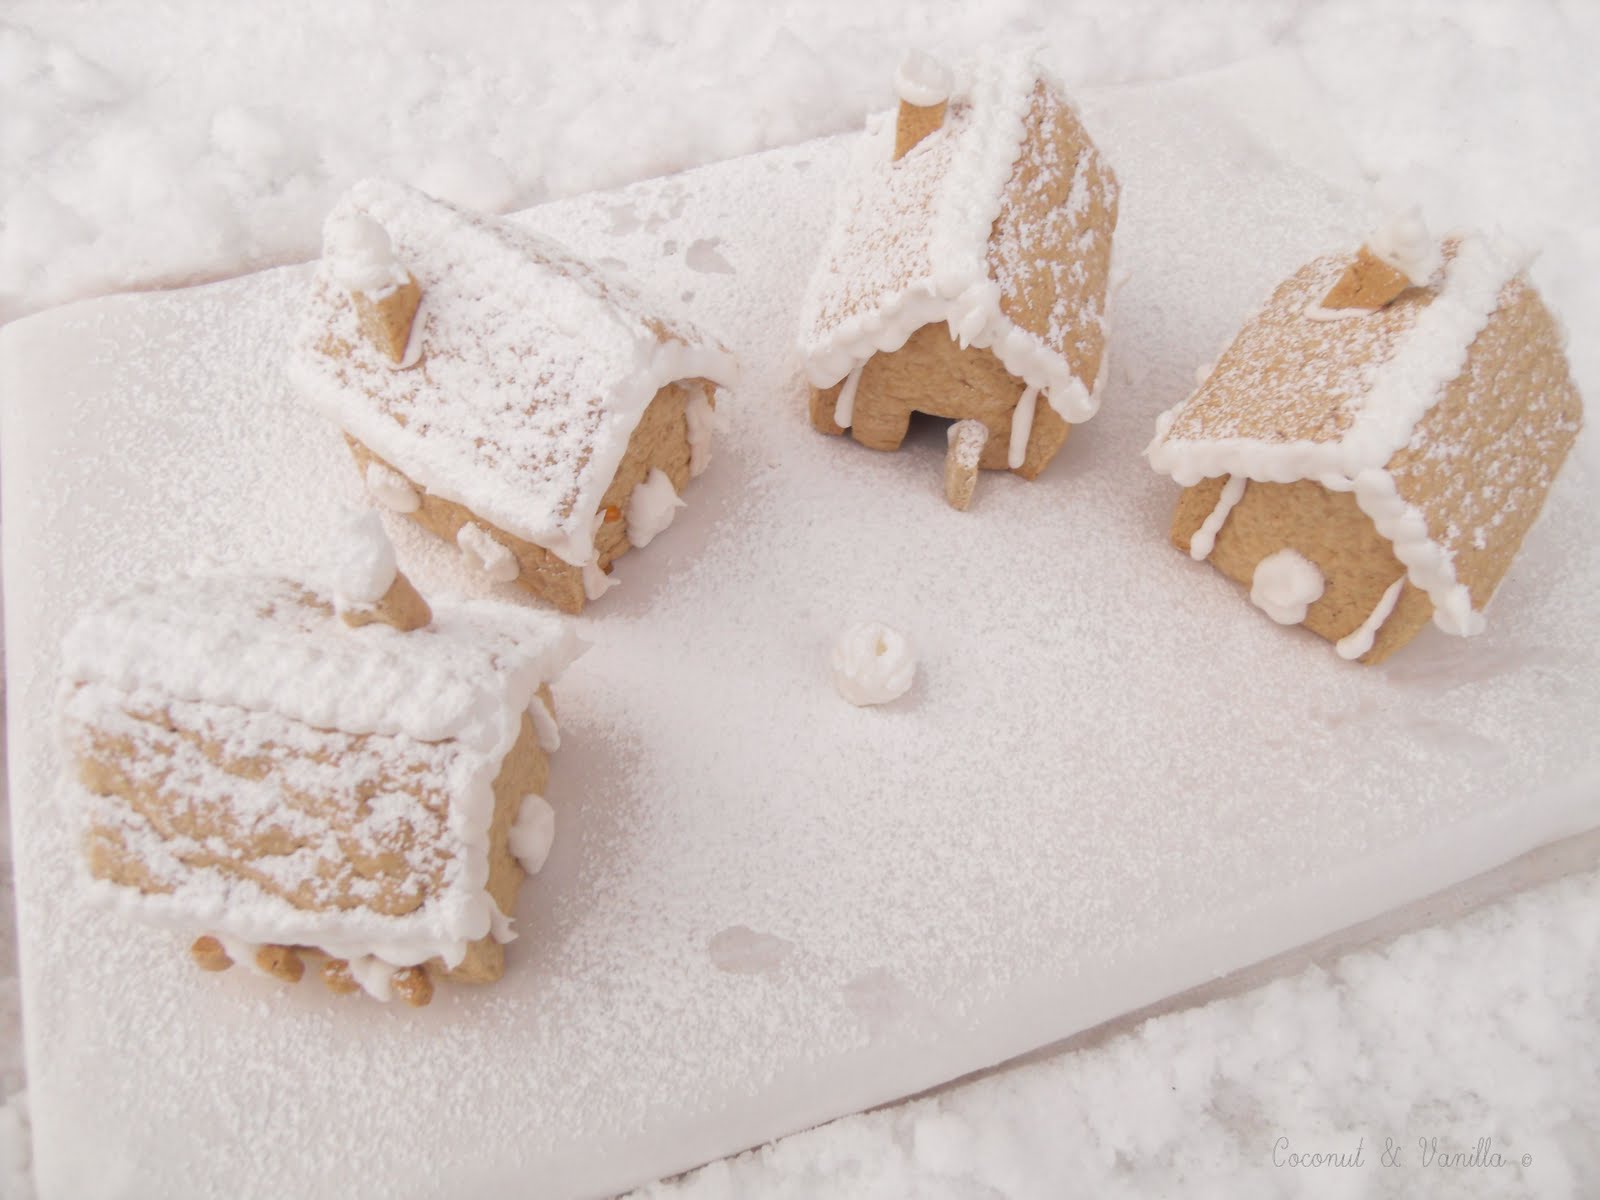
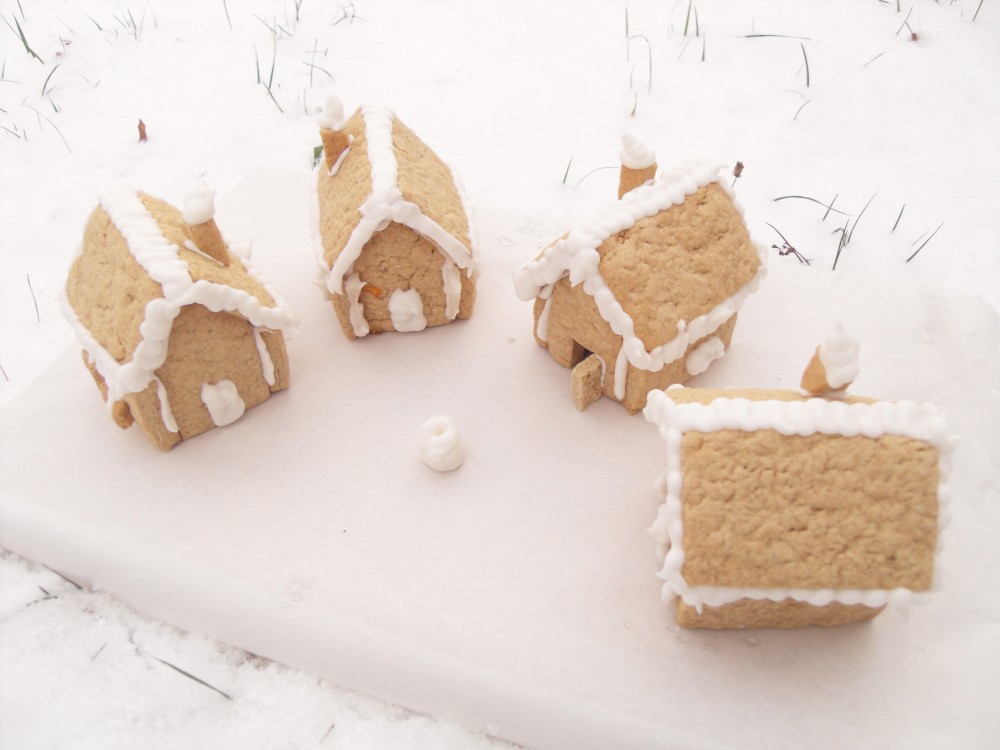
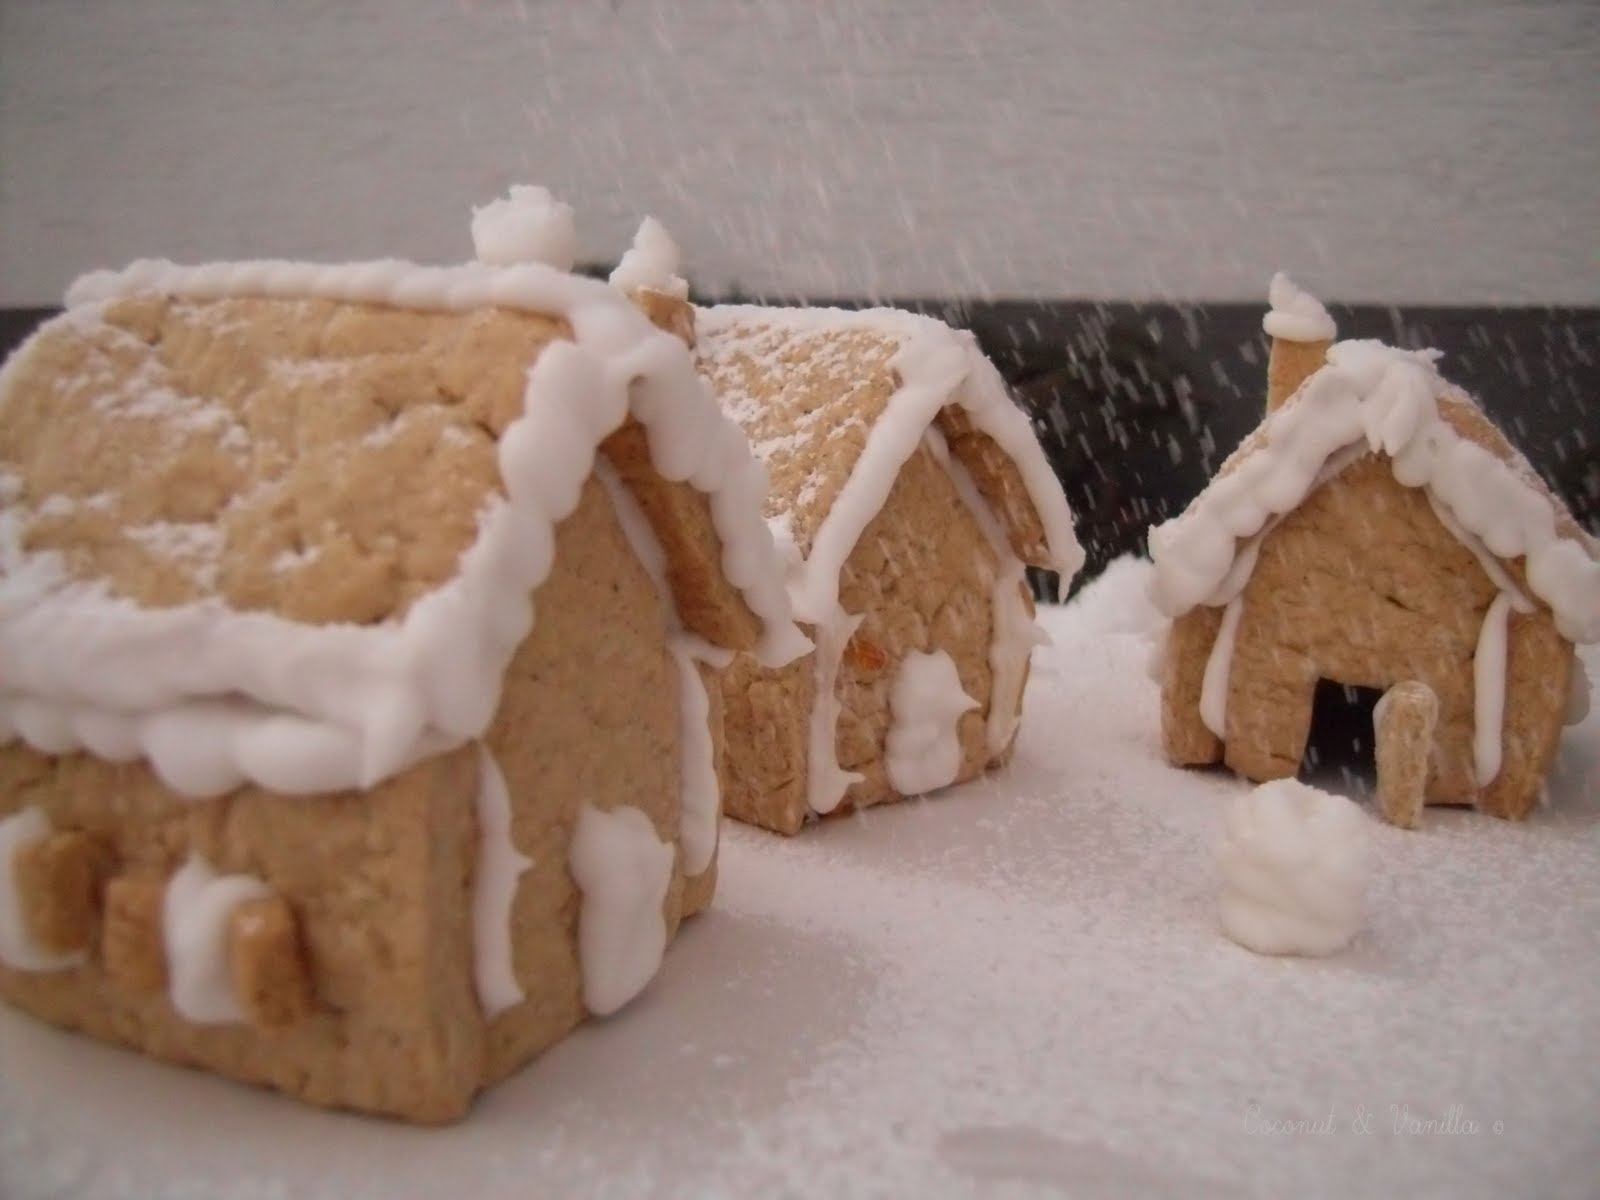
As I first read about the challenge in the forum of the Daring Bakers, I thought „how boring“. Then I was thinking about what I can do to make this challenge more fun and interesting and not „just another gingerbread house“. Maybe in your country gingerbread houses are not so common, but here in southern Germany you see them very often. So I decided to make a whole village of smaller houses. I told this idea a friend of mine Sten, and he said, he would make a church, because every village deserves a church. I was very sceptical and said than he had to do this on his own. So last week I prepared the dough from the recipe from The Great Scandinavian Baking Book by Beatrice Ojakangas and on the weekend we met and I prepared the village (with some help from Frank) and Sten was trying on the church. As it took a lot of time, we delayed the gluing and building on another day.

Lebkuchendorf

So on monday Frank and I were standing in the kitchen and put the houses together and we also tried this with the church. But somehow S. forgot two pieces of the roof for the tower and all the pieces for the roofs (two and rest of the church) were much too short. We think he didn’t added the thickness of the walls to the roof. So the church looked …ahm… how should I say that… awful? *laugh* Sorry, Sten! The church without the tower looked like a „Mehrzweckhalle“ (multi-purpose hall) as we say in german. So no church for the village in the end. But I let me carry away to build a small well out of royal icing. Speaking of the royal icing … I love it! It’s so easy to make and to handle. It dries fast and looks so nice. I thought also about to colour the icing in some nice pastel colours, but in the end I preferred the classical version – just white like snow.

Lebkuchendorf

I chose the recipe from The Great Scandinavian Baking Book, because the other recipe (which is also posted below, if you want to try) uses molasses and I do not know exactly what to use for here in Germany. My dough didn’t turn out very dark, but I have seen, that’s normal for that recipe. Secondary the dough wasn’t really smooth. It was really hard to roll out the dough and after baking it also rose. So be sure you don’t make the dough too thick. Lot of people had the problem, that the dough shrinked in the oven. I didn’t seem to me, that it happened with my dough, but be prepared! As you are applying everywhere the royal icing, you won’t see that much of the dough in the end. So don’t worry!

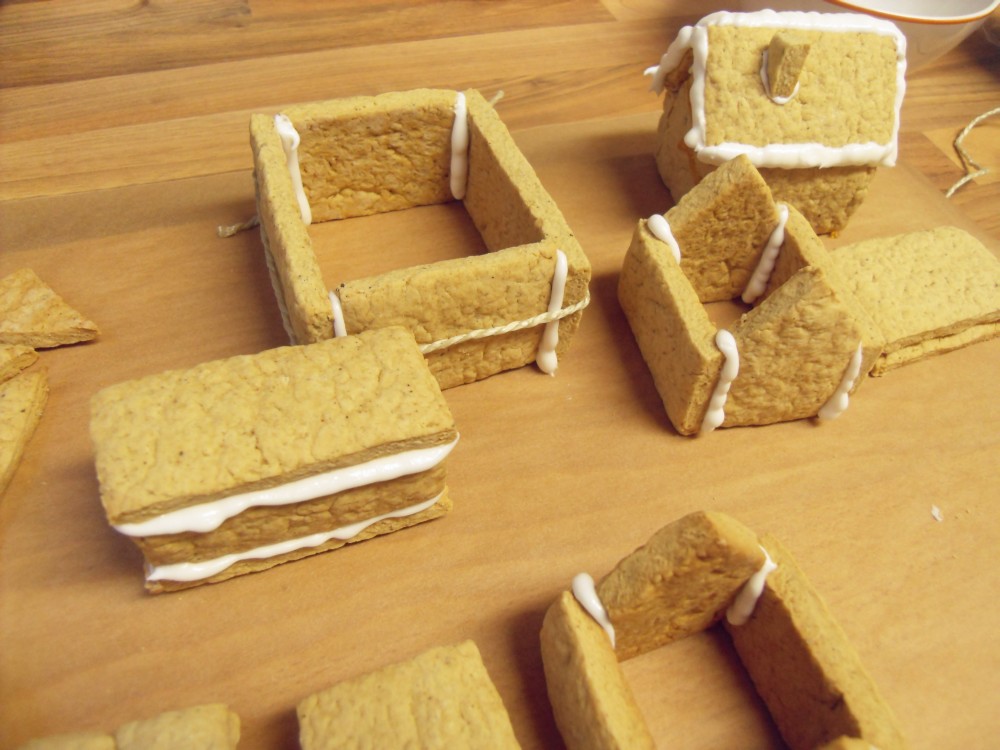
It was optional to use sugar syrup to glue the house, but for me it didn’t work fine. It hardened to fast and did not look very nice. So I glued everything with the royal icing, which worked very well. Don’t forget, that you have to chill the dough for at least two hours. I let mine cool for 2 days… You can also prepare it, freeze it and thaw it when you want. What is also important to make, are templates. Below you can see mine. Otherwise it’s possible that your pieces won’t fit together.

Lebkuchendorf

I don’t provide the recipes, because I wouldn’t recommend it, as it wasn’t good in taste and texture.

gingerbread village

I hope you all had wonderful holidays and you enjoyed the festivites. I did, since I didn’t had much time recently, which you probably realized, because it’s the first entry this month in my beloved blog. I swear it will be better in the new year.

So this entry is all about the December’s Daring Bakers challenge.


gingerbread village

The December 2009 Daring Bakers’ challenge was brought to you by Anna of Very Small Anna and Y of Lemonpi. They chose to challenge Daring Bakers’ everywhere to bake and assemble a gingerbread house from scratch. They chose recipes from Good Housekeeping and from The Great Scandinavian Baking Book as the challenge recipes.

gingerbread village

As I first read about the challenge in the forum of the Daring Bakers, I thought „how boring“. Then I was thinking about what I can do to make this challenge more fun and interesting and not „just another gingerbread house“. Maybe in your country gingerbread houses are not so common, but here in southern Germany you see them very often. So I decided to make a whole village of smaller houses.  I told this idea a friend of mine Sten, and he said, he would make a church, because every village deserves a church. I was very sceptical and said than he had to do this on his own. So last week I prepared the dough from the recipe from The Great Scandinavian Baking Book by Beatrice Ojakangas and on the weekend we met and I prepared the village (with some help from Frank) and Sten was trying on the church. As it took a lot of time, we delayed the gluing and building on another day.

gingerbread village

 So on monday Frank and I were standing in the kitchen and put the houses together and we also tried this with the church. But somehow S. forgot two pieces of the roof for the tower and all the pieces for the roofs (two and rest of the church) were much too short. We think he didn’t added the thickness of the walls to the roof. So the church looked …ahm… how should I say that… awful? *laugh* Sorry, Sten! The church without the tower looked like a „Mehrzweckhalle“ (multi-purpose hall) as we say in german. So no church for the village in the end. But I let me carry away to build a small well out of royal icing. Speaking of the royal icing … I love it! It’s so easy to make and to handle. It dries fast and looks so nice. I thought also about to colour the icing in some nice pastel colours, but in the end I preferred the classical version – just white like snow.

gingerbread village

 I chose the recipe from The Great Scandinavian Baking Book, because the other recipe (which is also posted below, if you want to try) uses molasses and I do not know exactly what to use for here in Germany. My dough didn’t turn out very dark, but I have seen, that’s normal for that recipe. Secondary the dough wasn’t really smooth. It was really hard to roll out the dough and after baking it also rose. So be sure you don’t make the dough too thick. Lot of people had the problem, that the dough shrinked in the oven. I didn’t seem to me, that it happened with my dough, but be prepared! As you are applying everywhere the royal icing, you won’t see that much of the dough in the end. So don’t worry!

 It was optional to use sugar syrup to glue the house, but for me it didn’t work fine. It hardened to fast and did not look very nice. So I glued everything with the royal icing, which worked very well. Don’t forget, that you have to chill the dough for at least two hours. I let mine cool for 2 days… You can also prepare it, freeze it and thaw it when you want. What is also important to make, are templates. Below you can see mine. Otherwise it’s possible that your pieces won’t fit together. 

gingerbread village

 I don’t provide the recipes, because I wouldn’t recommend it, as it wasn’t good in taste and texture.

Vol au Vents mit BirnenkompottVol au Vents with pear compote

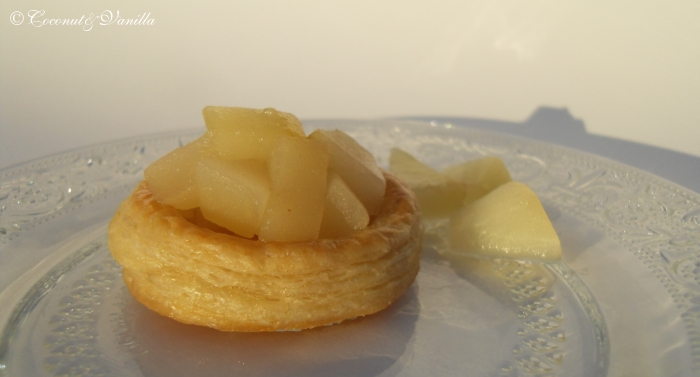
After one week I can finally reveal the secret I had to keep: Last weekend I made puff pastry for the first time of my life for the first challenge I did for the Daring Bakers. And it really was a challenge!

Whilst rolling out the first two turns I only thought „Oh no this won’t work! It looks terrible!“. But hey, after that I thought „hm does’nt look that bad“. Ok so I was satisfied until I baked them. They didn’t get really high. Maybe I should have chilled the vol-au-vents another time before baking. But I didn’t had the patience to try it again.

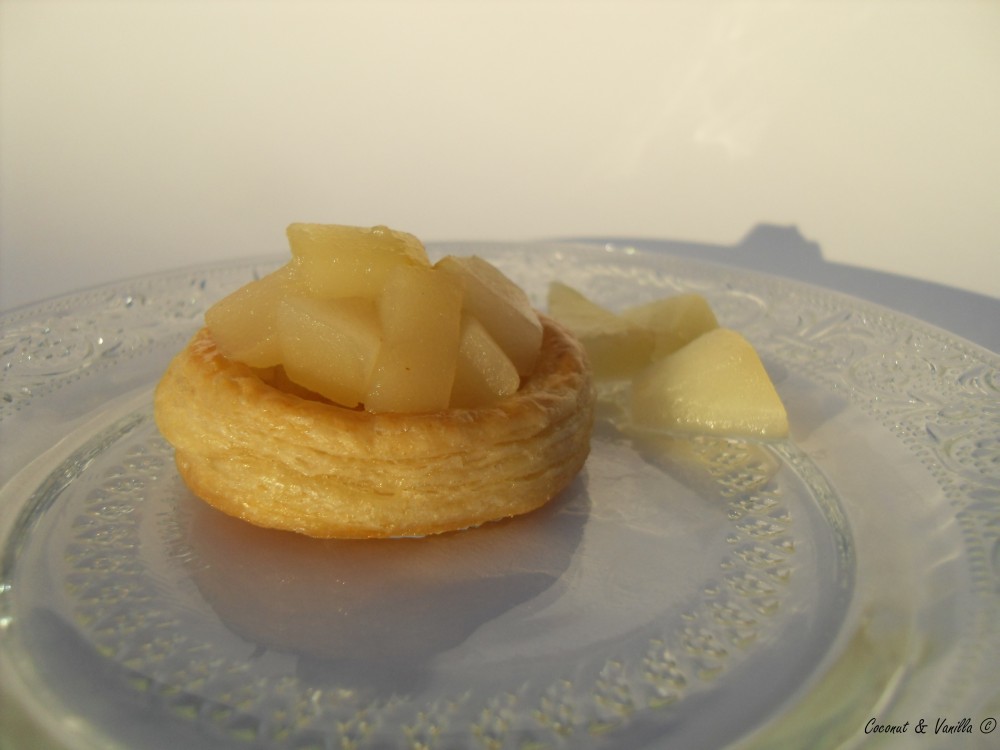
What I really liked was the filling. I made some pear compote with german William’s Christ, brown sugar and cinnamon. It’s so autumn. For me it’s feeling like autumn, although it’s still very warm here in southern Germany and the sun is shining almost all the time.

The September 2009 Daring Baker’s challenge was hosted by Steph of A Whisk and a Spoon. She chose the French treat, Vol-au-Vent based on the Puff Pastry recipe by Michel Richard from the cookbook Baking With Julia by Dorie Greenspan.

vol au vents with pear compote


Recipe

Vol au vents

from Baking with Julia by Dorie Greenspan

Yield: 1- 1,5 kg dough

Ingredients:

  • 354 g unbleached all-purpose flour
  • 142 g cake flour
  • 1 tbsp. salt (you can cut this by half for a less salty dough or for sweet preparations)
  • 300 ml ice water
  • 454 g very cold unsalted butter

plus extra flour for dusting work surface

Mixing the dough:

Check the capacity of your food processor before you start. If it cannot hold the full quantity of ingredients, make the dough into two batches and combine them.

Put the all-purpose flour, cake flour, and salt in the work bowl of a food processor fitted with a metal blade and pulse a couple of times just to mix. Add the water all at once, pulsing until the dough forms a ball on the blade. The dough will be very moist and pliable and will hold together when squeezed between your fingers. (Actually, it will feel like Play-Doh.)

Remove the dough from the machine, form it into a ball, with a small sharp knife, slash the top in a tic-tac-toe pattern. Wrap the dough in a damp towel and refrigerate for about 5 minutes.

Meanwhile, place the butter between 2 sheets of plastic wrap and beat it with a rolling pin until it flattens into a square that’s about 1″ thick. Take care that the butter remains cool and firm: if it has softened or become oily, chill it before continuing.

Incorporate the butter:

Unwrap the dough and place it on a work surface dusted with all-purpose flour (A cool piece of marble is the ideal surface for puff pastry) with your rolling pin (preferably a French rolling pin without handles), press on the dough to flatten it and then roll it into a 10″ square. Keep the top and bottom of the dough well floured to prevent sticking and lift the dough and move it around frequently. Starting from the center of the square, roll out over each corner to create a thick center pad with „ears,“ or flaps.

Place the cold butter in the middle of the dough and fold the ears over the butter, stretching them as needed so that they overlap slightly and encase the butter completely. (If you have to stretch the dough, stretch it from all over; don’t just pull the ends) you should now have a package that is 8″ square.

To make great puff pastry, it is important to keep the dough cold at all times. There are specified times for chilling the dough, but if your room is warm, or you work slowly, or you find that for no particular reason the butter starts to ooze out of the pastry, cover the dough with plastic wrap and refrigerate it . You can stop at any point in the process and continue at your convenience or when the dough is properly chilled.

Making the turns:

Gently but firmly press the rolling pin against the top and bottom edges of the square (this will help keep it square). Then, keeping the work surface and the top of the dough well floured to prevent sticking, roll the dough into a rectangle that is three times as long as the square you started with, about 24″ (don’t worry about the width of the rectangle: if you get the 24″, everything else will work itself out.) With this first roll, it is particularly important that the butter be rolled evenly along the length and width of the rectangle; check when you start rolling that the butter is moving along well, and roll a bit harder or more evenly, if necessary, to get a smooth, even dough-butter sandwich (use your arm-strength!).

With a pastry brush, brush off the excess flour from the top of the dough, and fold the rectangle up from the bottom and down from the top in thirds, like a business letter, brushing off the excess flour. You have completed one turn.

Rotate the dough so that the closed fold is to your left, like the spine of a book. Repeat the rolling and folding process, rolling the dough to a length of 24″ and then folding it in thirds. This is the second turn.

Chilling the Dough:

If the dough is still cool and no butter is oozing out, you can give the dough another two turns now. If the condition of the dough is iffy, wrap it in plastic wrap and refrigerate it for at least 30 minutes. Each time you refrigerate the dough, mark the number of turns you’ve completed by indenting the dough with your fingertips. It is best to refrigerate the dough for 30 to 60 minutes between each set of two turns.

The total number of turns needed is six. If you prefer, you can give the dough just four turns now, chill it overnight, and do the last two turns the next day. Puff pastry is extremely flexible in this regard. However, no matter how you arrange your schedule, you should plan to chill the dough for at least an hour before cutting or shaping it.

Forming and Baking the Vol au Vents:

In addition to the equipment listed above, you will need: -well-chilled puff pastry dough (recipe below) -egg wash (1 egg or yolk beaten with a small amount of water) -your filling of choice

Line a baking sheet with parchment and set aside.

Using a knife or metal bench scraper, divided your chilled puff pastry dough into three equal pieces. Work with one piece of the dough, and leave the rest wrapped and chilled. (If you are looking to make more vols-au-vent than the yield stated above, you can roll and cut the remaining two pieces of dough as well…if not, then leave refrigerated for the time being or prepare it for longer-term freezer storage. See the “Tips” section below for more storage info.)

On a lightly floured surface, roll the piece of dough into a rectangle about 1/8 to 1/4-inch (3-6 mm) thick. Transfer it to the baking sheet and refrigerate for about 10 minutes before proceeding with the cutting.

(This assumes you will be using round cutters, but if you do not have them, it is possible to cut square vols-au-vents using a sharp chef’s knife.) For smaller, hors d’oeuvre sized vols-au-vent, use a 1.5” round cutter to cut out 8-10 circles. For larger sized vols-au-vent, fit for a main course or dessert, use a 4” cutter to cut out about 4 circles. Make clean, sharp cuts and try not to twist your cutters back and forth or drag your knife through the dough. Half of these rounds will be for the bases, and the other half will be for the sides. (Save any scrap by stacking—not wadding up—the pieces…they can be re-rolled and used if you need extra dough. If you do need to re-roll scrap to get enough disks, be sure to use any rounds cut from it for the bases, not the ring-shaped sides.)

Using a ¾-inch cutter for small vols-au-vent, or a 2- to 2.5-inch round cutter for large, cut centers from half of the rounds to make rings. These rings will become the sides of the vols-au-vent, while the solid disks will be the bottoms. You can either save the center cut-outs to bake off as little “caps” for you vols-au-vent, or put them in the scrap pile.

Dock the solid bottom rounds with a fork (prick them lightly, making sure not to go all the way through the pastry) and lightly brush them with egg wash. Place the rings directly on top of the bottom rounds and very lightly press them to adhere. Brush the top rings lightly with egg wash, trying not to drip any down the sides (which may inhibit rise). If you are using the little “caps,” dock and egg wash them as well.

Refrigerate the assembled vols-au-vent on the lined baking sheet while you pre-heat the oven to 400ºF (200ºC). (You could also cover and refrigerate them for a few hours at this point.)

Once the oven is heated, remove the sheet from the refrigerator and place a silicon baking mat (preferred because of its weight) or another sheet of parchment over top of the shells. This will help them rise evenly. Bake the shells until they have risen and begin to brown, about 10-15 minutes depending on their size. Reduce the oven temperature to 350ºF (180ºC), and remove the silicon mat or parchment sheet from the top of the vols-au-vent. If the centers have risen up inside the vols-au-vent, you can gently press them down. Continue baking (with no sheet on top) until the layers are golden, about 15-20 minutes more. (If you are baking the center “caps” they will likely be finished well ahead of the shells, so keep an eye on them and remove them from the oven when browned.)

Remove to a rack to cool. Cool to room temperature for cold fillings or to warm for hot fillings.

Fill and serve.

*For additional rise on the larger-sized vols-au-vents, you can stack one or two additional ring layers on top of each other (using egg wash to „glue“). This will give higher sides to larger vols-au-vents, but is not advisable for the smaller ones, whose bases may not be large enough to support the extra weight.

*Although they are at their best filled and eaten soon after baking, baked vols-au-vent shells can be stored airtight for a day.

*Shaped, unbaked vols-au-vent can be wrapped and frozen for up to a month (bake from frozen, egg-washing them first).


Datenschutz
, Inhaber: (Firmensitz: Deutschland), verarbeitet zum Betrieb dieser Website personenbezogene Daten nur im technisch unbedingt notwendigen Umfang. Alle Details dazu in der Datenschutzerklärung.
Datenschutz
, Inhaber: (Firmensitz: Deutschland), verarbeitet zum Betrieb dieser Website personenbezogene Daten nur im technisch unbedingt notwendigen Umfang. Alle Details dazu in der Datenschutzerklärung.